Create a Database using phpMyAdmin on localhost
Learn how to create a database using phpMyAdmin on your localhost. This step-by-step tutorial will guide you through the process, ensuring you set up your database efficiently for various web development projects.
- Access phpMyAdmin
- Open your web browser and navigate to http://localhost/phpmyadmin/.
- Log in with your phpMyAdmin credentials.

- Navigate to the Databases Tab and create a Database
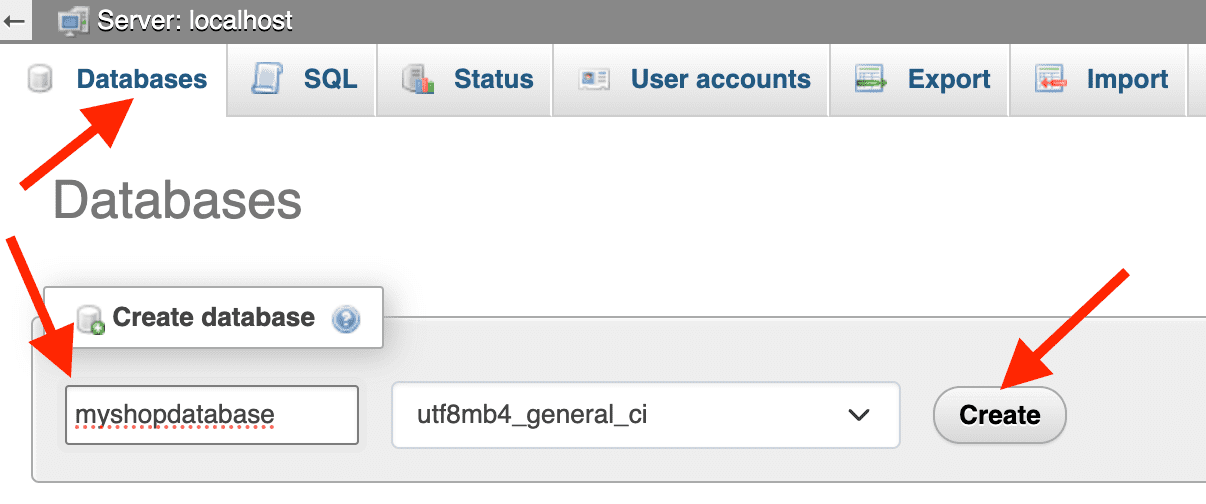
- Once logged in, click on the Databases tab located in the top menu.
- Type a database name, for example, myshopdatabase. Copy and save the database name in your Notepad/TextEdit for later use.
- Choose a suitable collation from the dropdown menu.
- Click on the Create button.
- You will see a confirmation message indicating that the database has been created successfully.
- Create and assign a new user to this database:
While in localhost, you can use your root username and password for this database. However, if you need to create and assign a new user to this database, follow these steps:
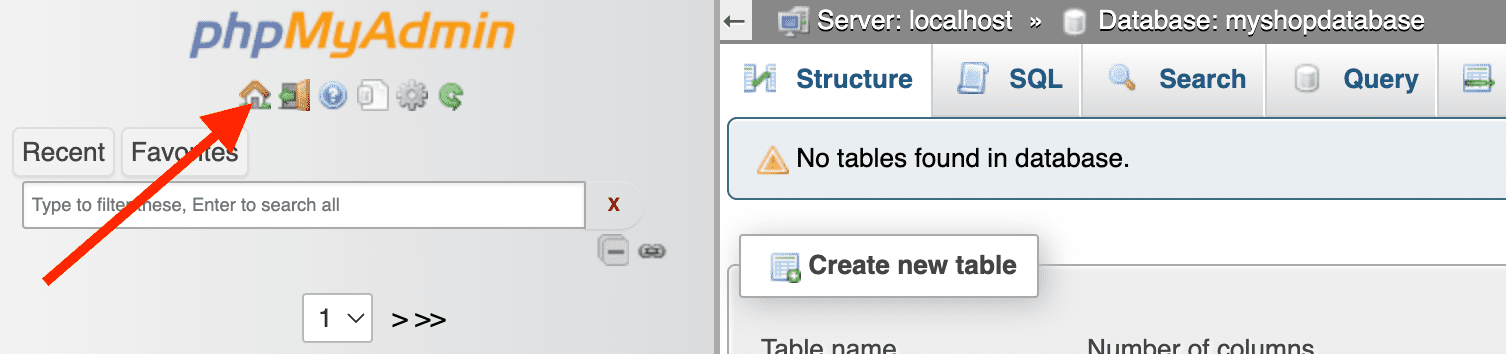
- Return to the phpMyAdmin homepage by clicking the home icon beneath the phpMyAdmin logo.
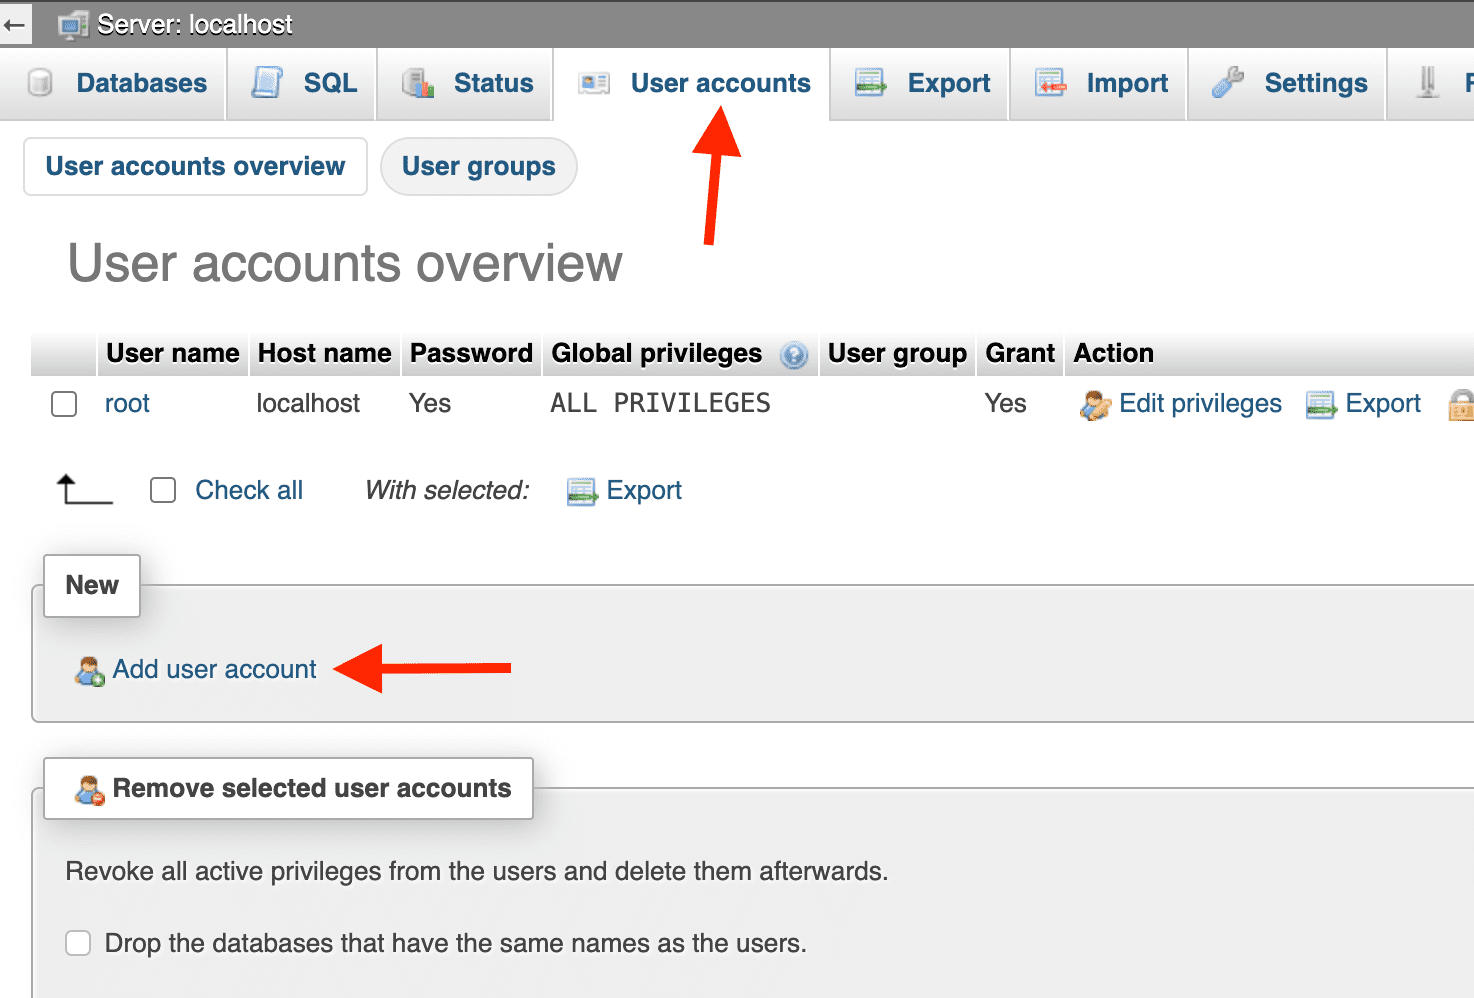
- Click on the User accounts tab located in the top menu.

- Click on the Add user account located under the New section.
- Enter the necessary information for the new MySQL/MariaDB user, including:
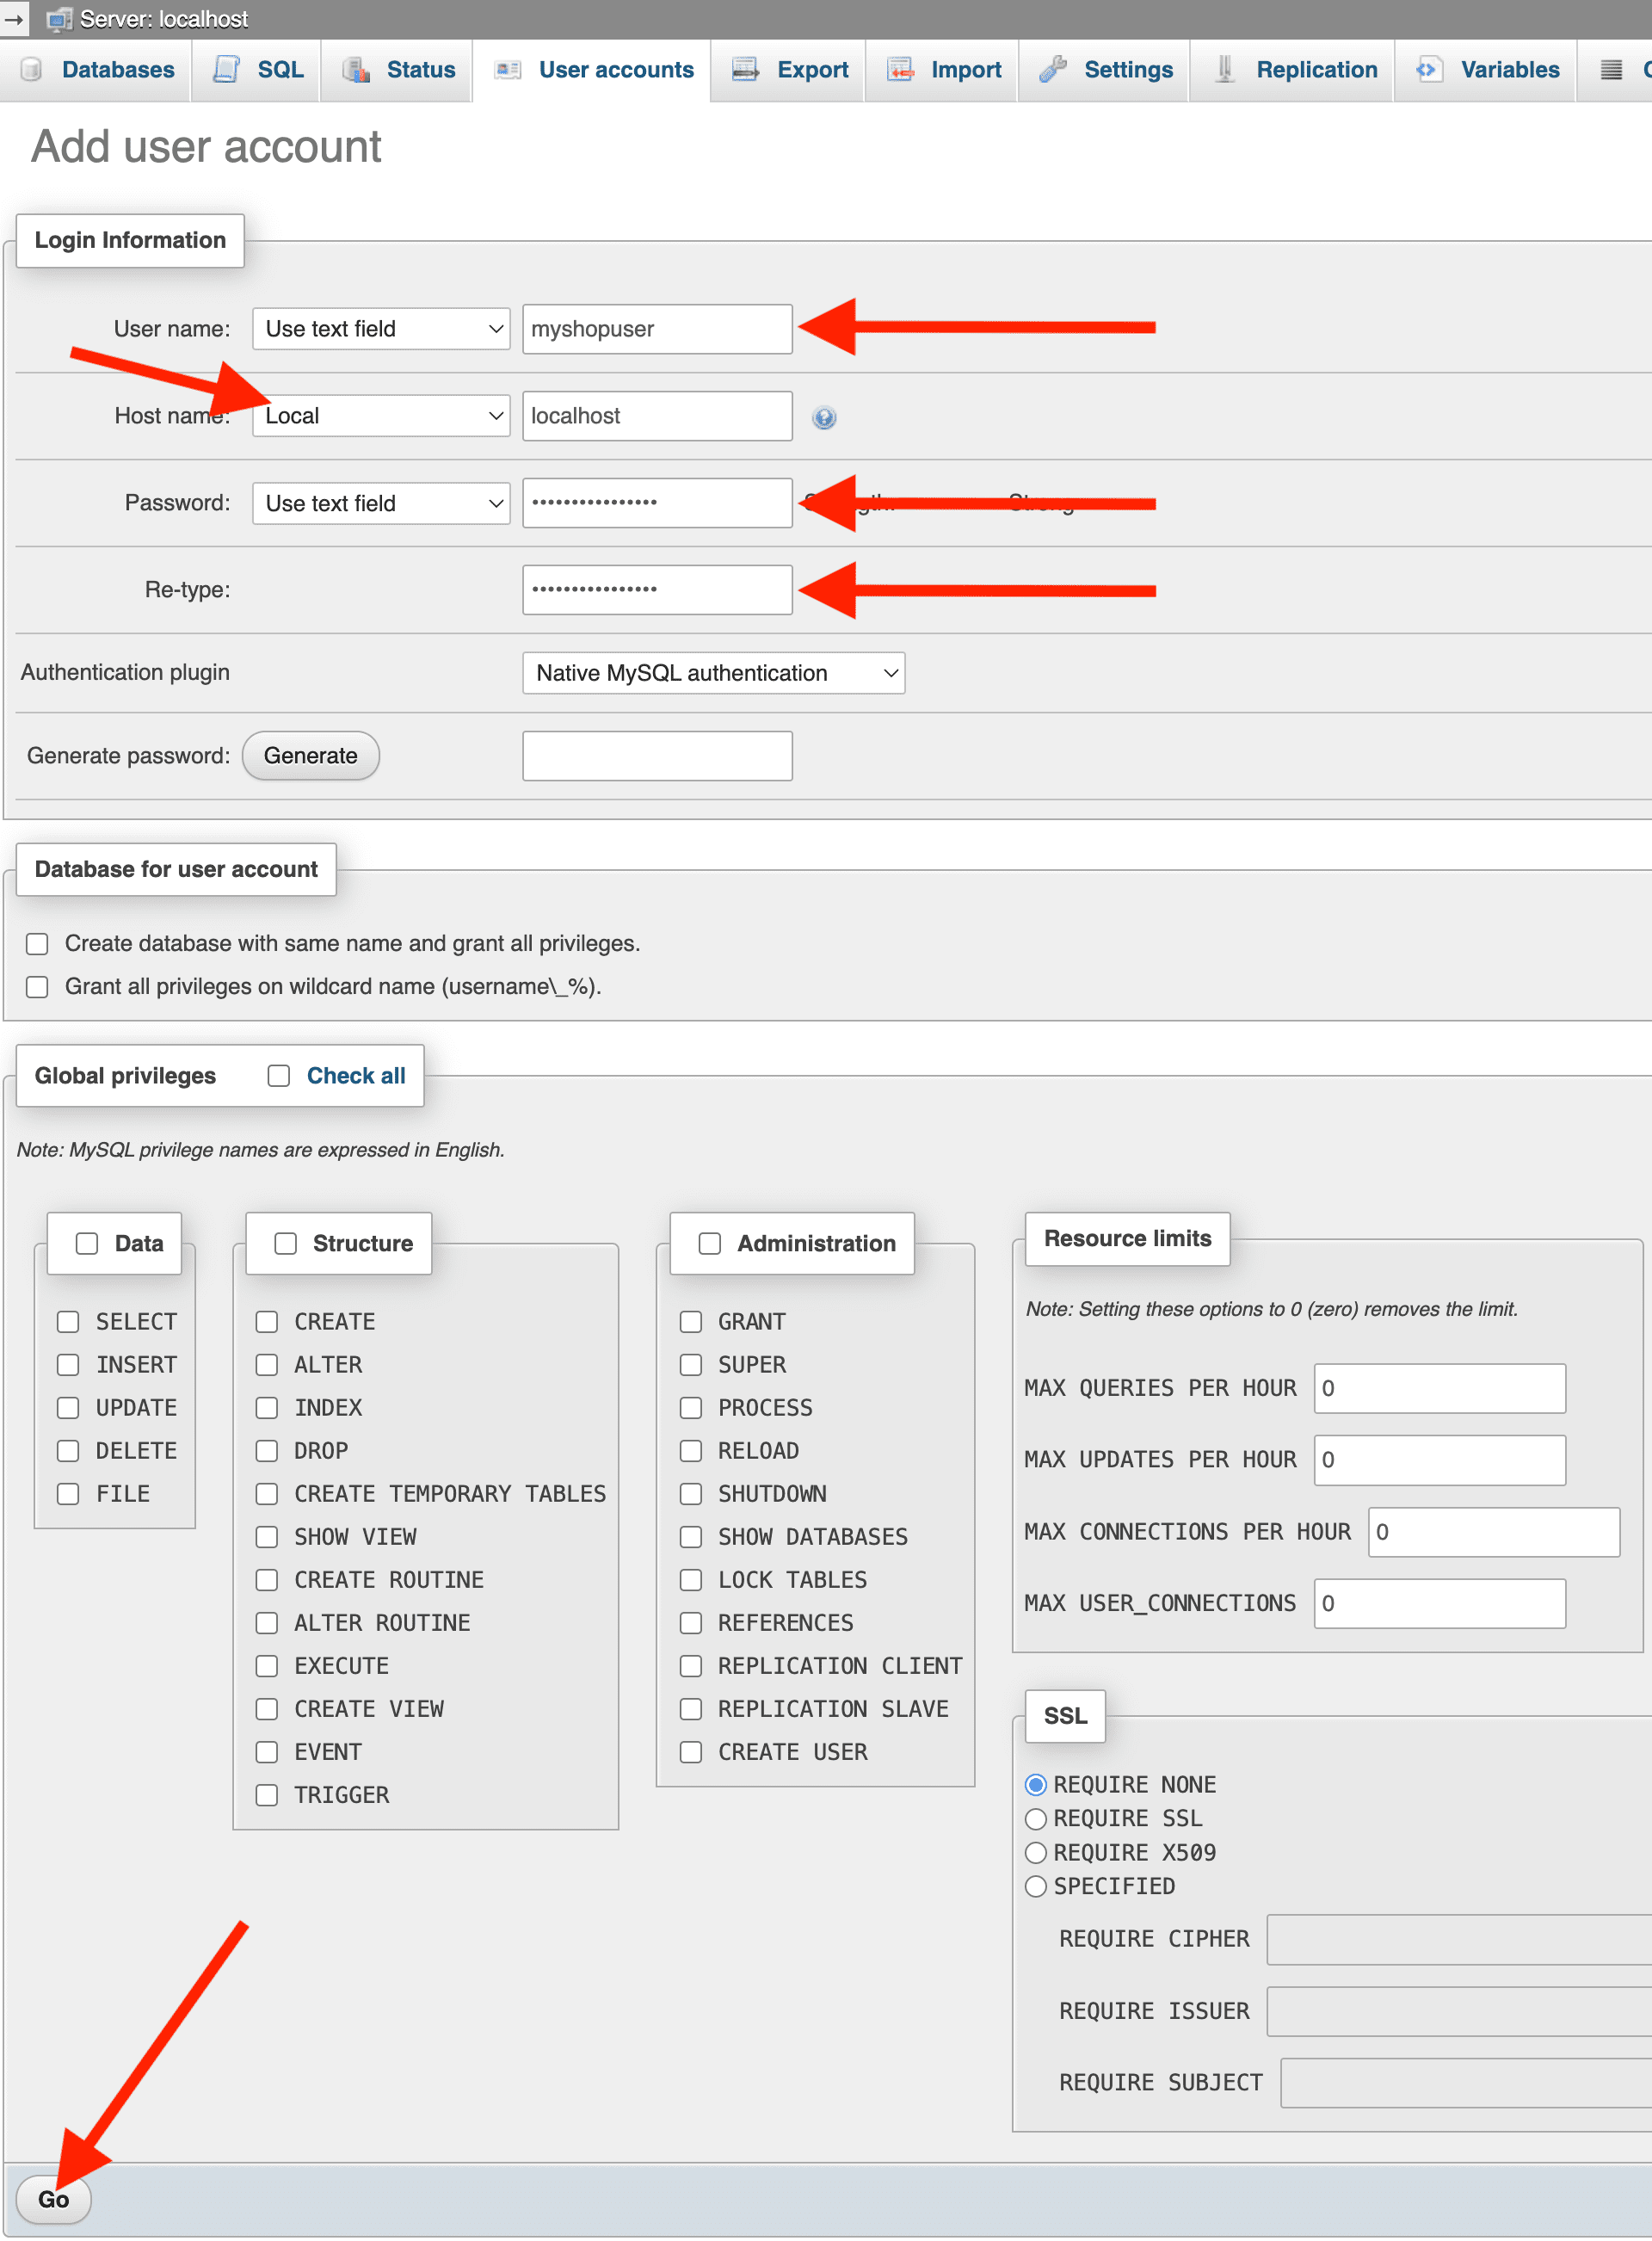
- User name: Enter a username without spaces and special characters, and use lowercase to avoid potential issues later on. For example: myshopuser. Copy and save the user name in your Notepad/TextEdit for later use.
- Host name: Choose Local if you do not require connection to this database from an external network or server.
- Password: Enter a new password. Copy and save the password in your Notepad/TextEdit for later use.
- Re-type: Re-type your new password.
- Leave other options as they are (unselected).
- Click on the Go button.
- Assign the user with the database:
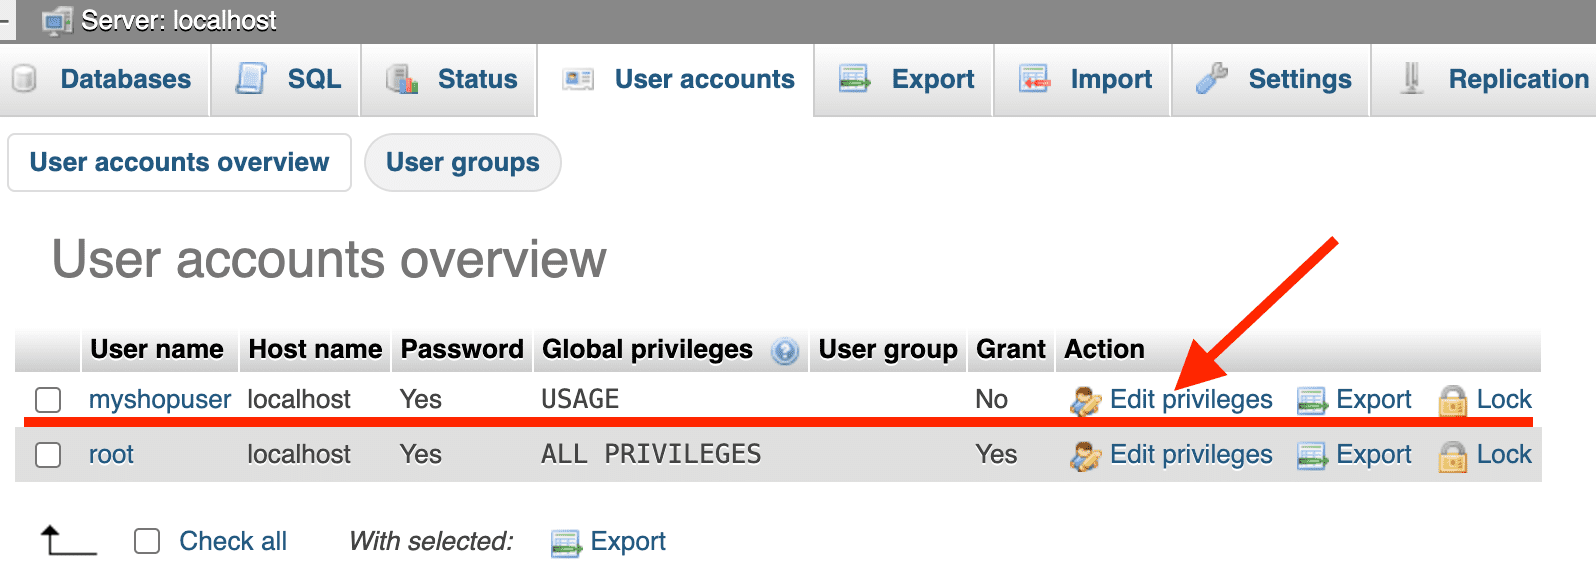
- Click on the User accounts tab located in the top menu.
- Click on the Edit Privileges under the user (myshopuser).
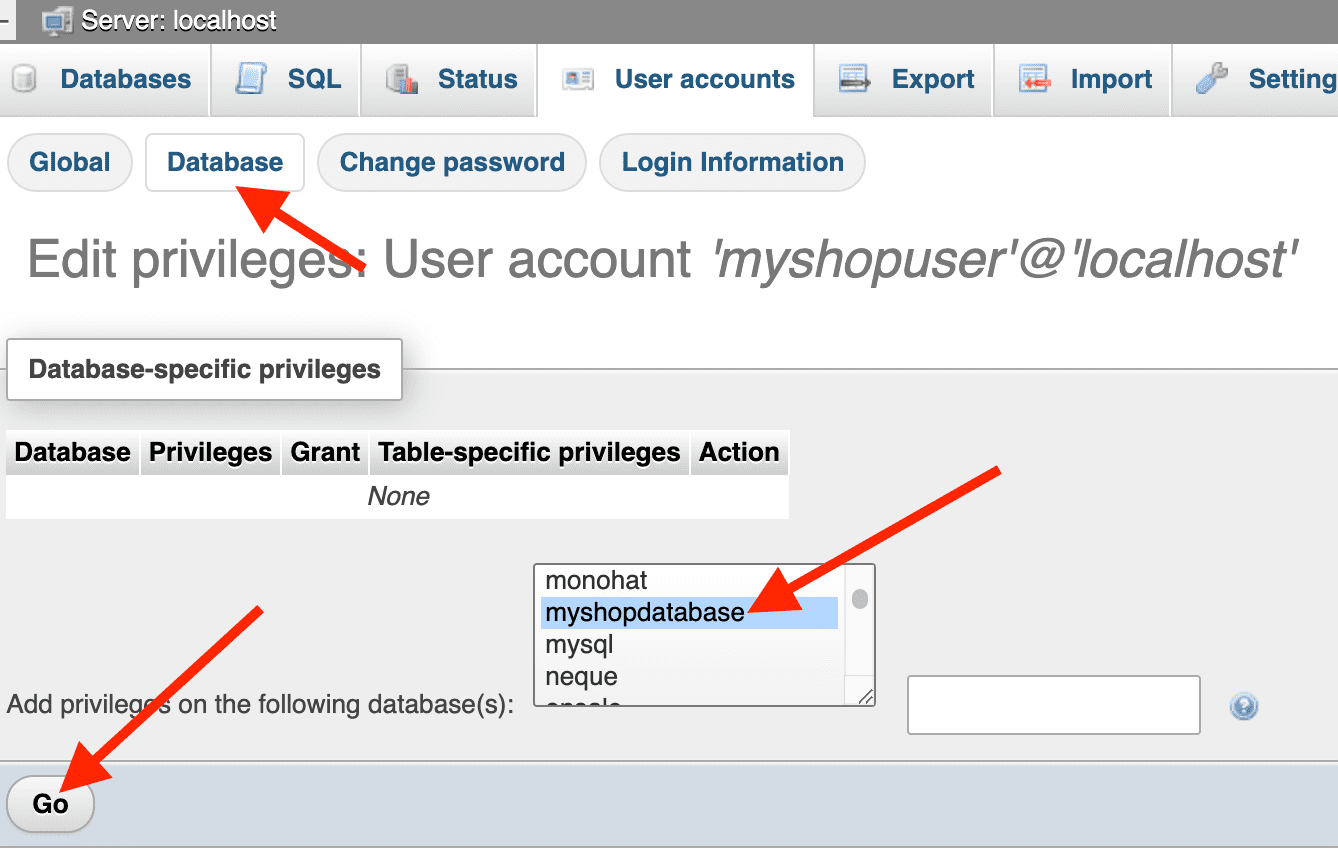
- Click on the Database tab, as illustrated in the following picture:
- Select the database, for example, myshopdatabase.
- Click on the Go button.
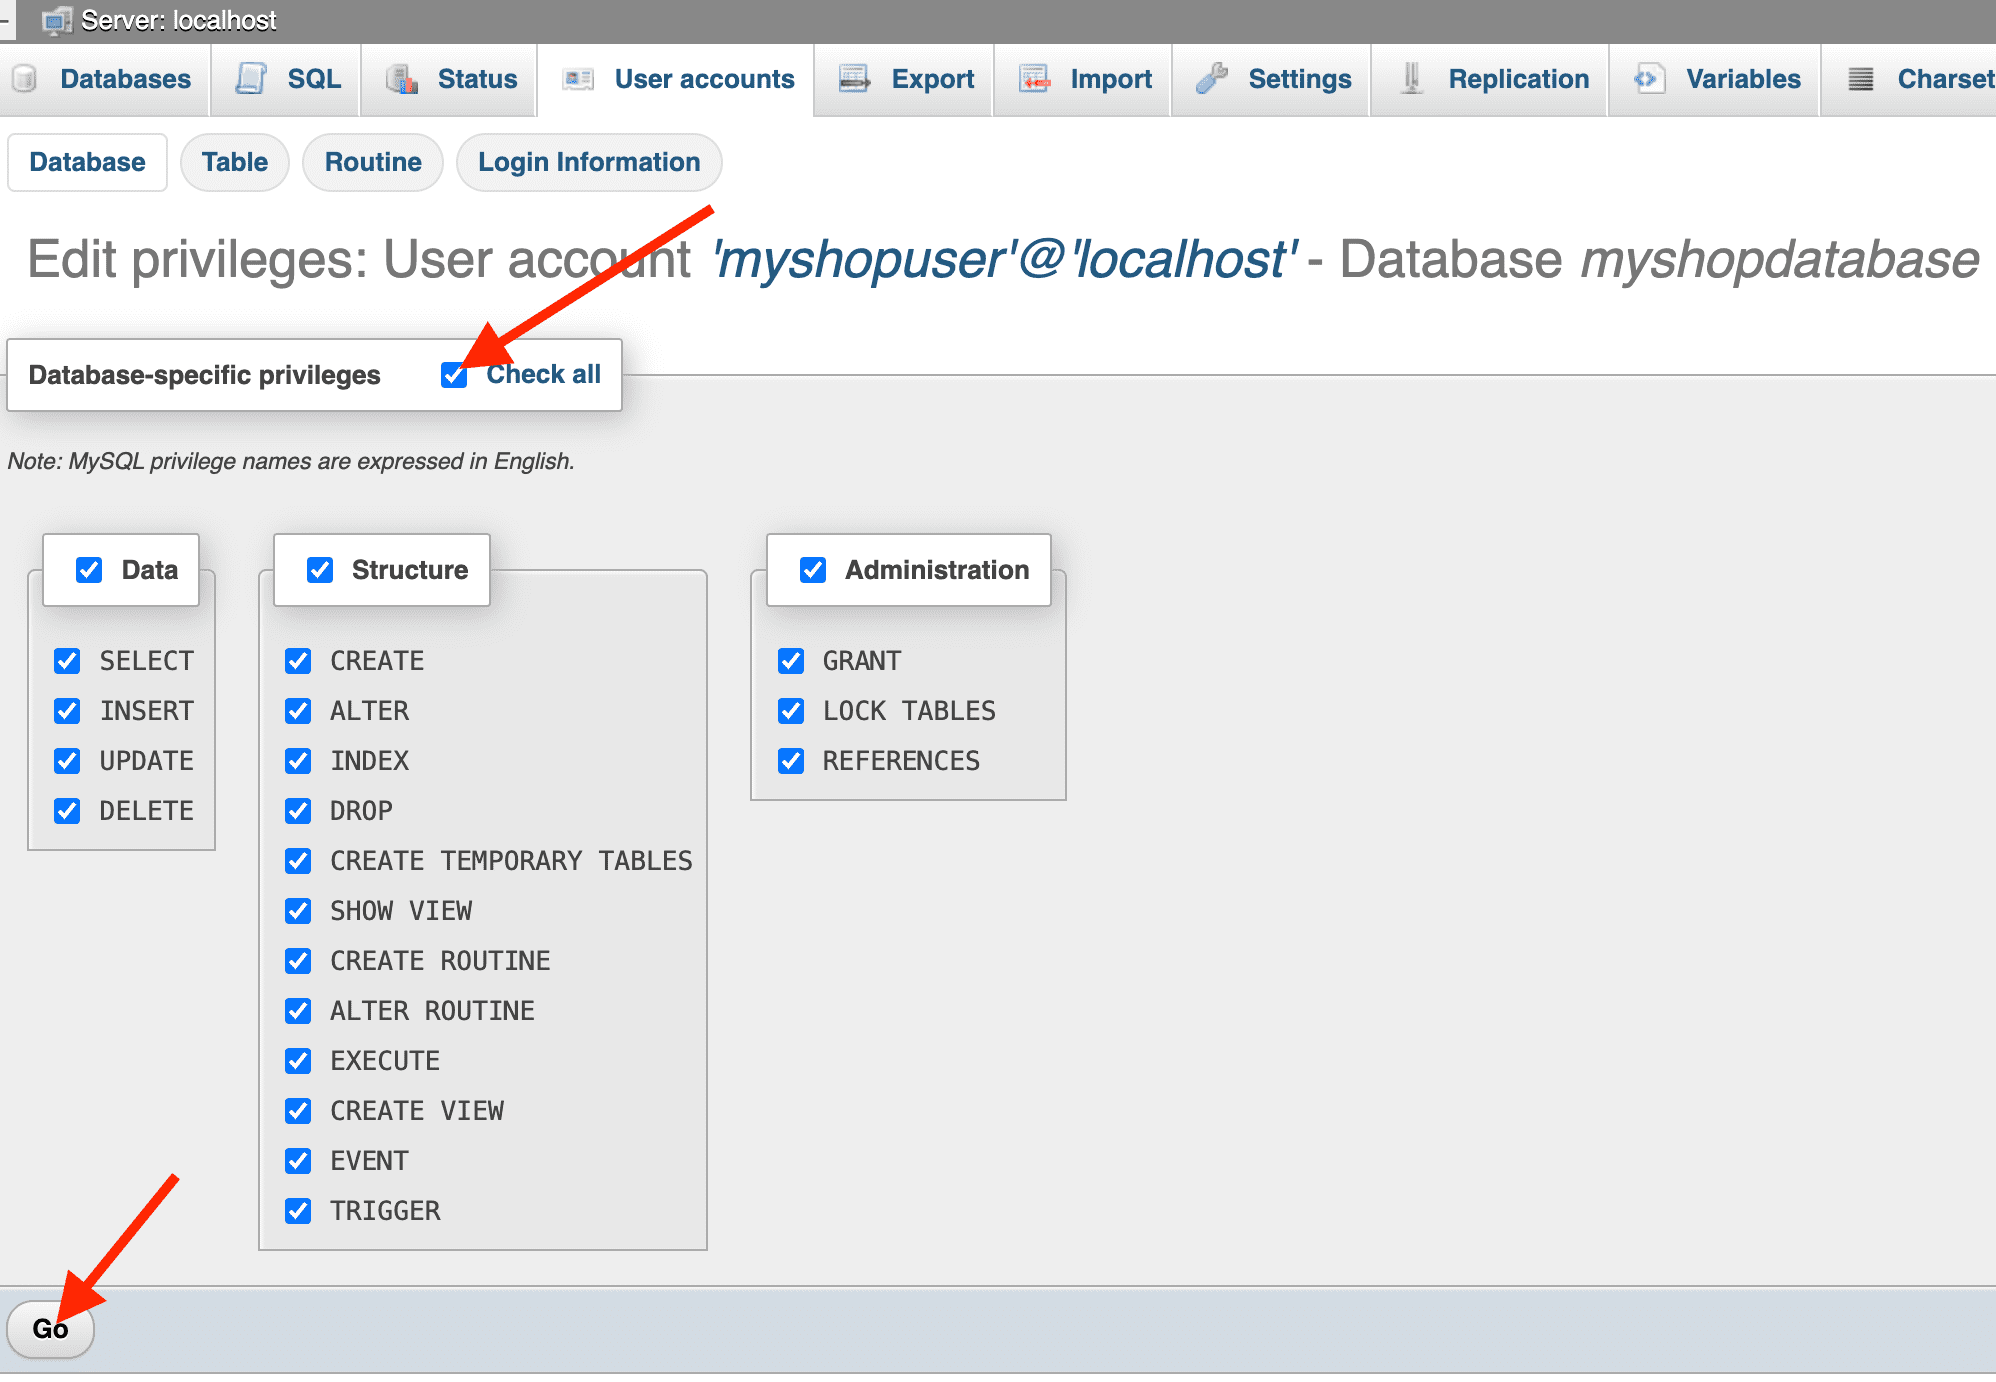
- Click on Check all next to the Database-specific privileges, as illustrated in the following picture:
- Click on Go button.
- Return to the phpMyAdmin homepage by clicking the home icon beneath the phpMyAdmin logo.
Congratulations! You have successfully created a database, a new user, and assigned the user to the database using phpMyAdmin on your localhost.