How to add custom form fields?
With Guest Support Pro extension, you will be able to add/edit/delete unlimited custom fields to each forms.
Supported custom fields are:
- Textbox
- Number Box
- Textarea
- Dropdown/Select
- Radio Group
- Checkbox Group
- Hidden
- Date Picker
- Date and Time Picker
- Content (Support HTML)
How to add new field to a form?
- Login to Joomla! Administrator
- Click on Components -> Guest Support -> Forms
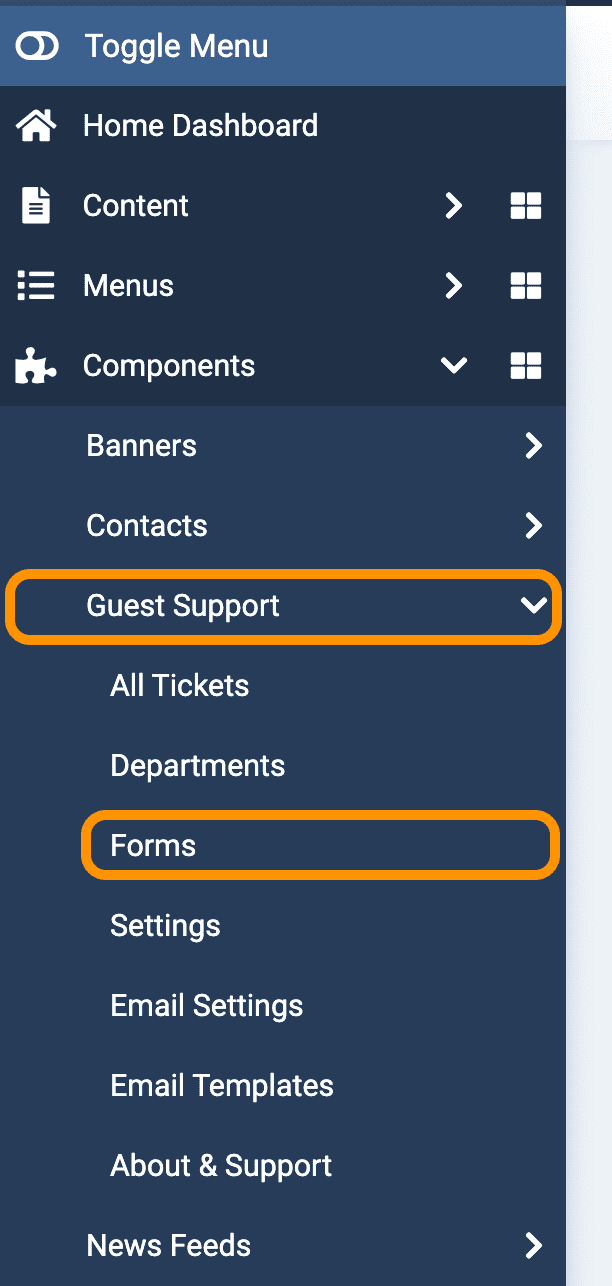
- From forms list, click on the form name you want to add custom field.
Alternatively, you can select the form and then click on ... Actions -> Edit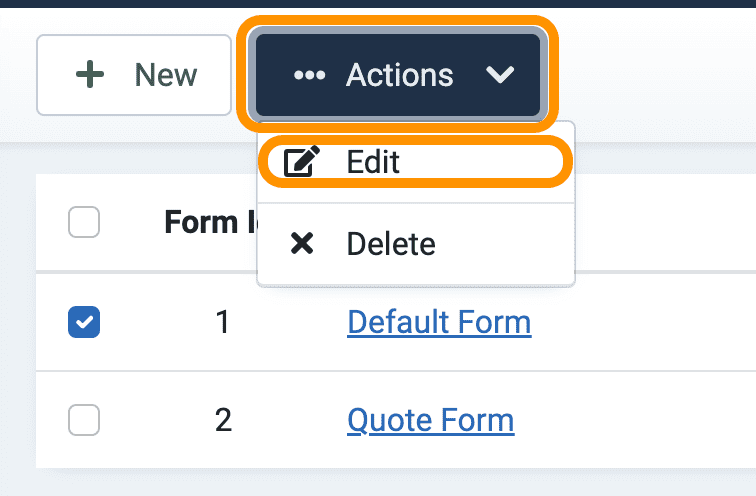
- Click on Add New Field button

- Select field type

- Now add necessary information to add new custom field
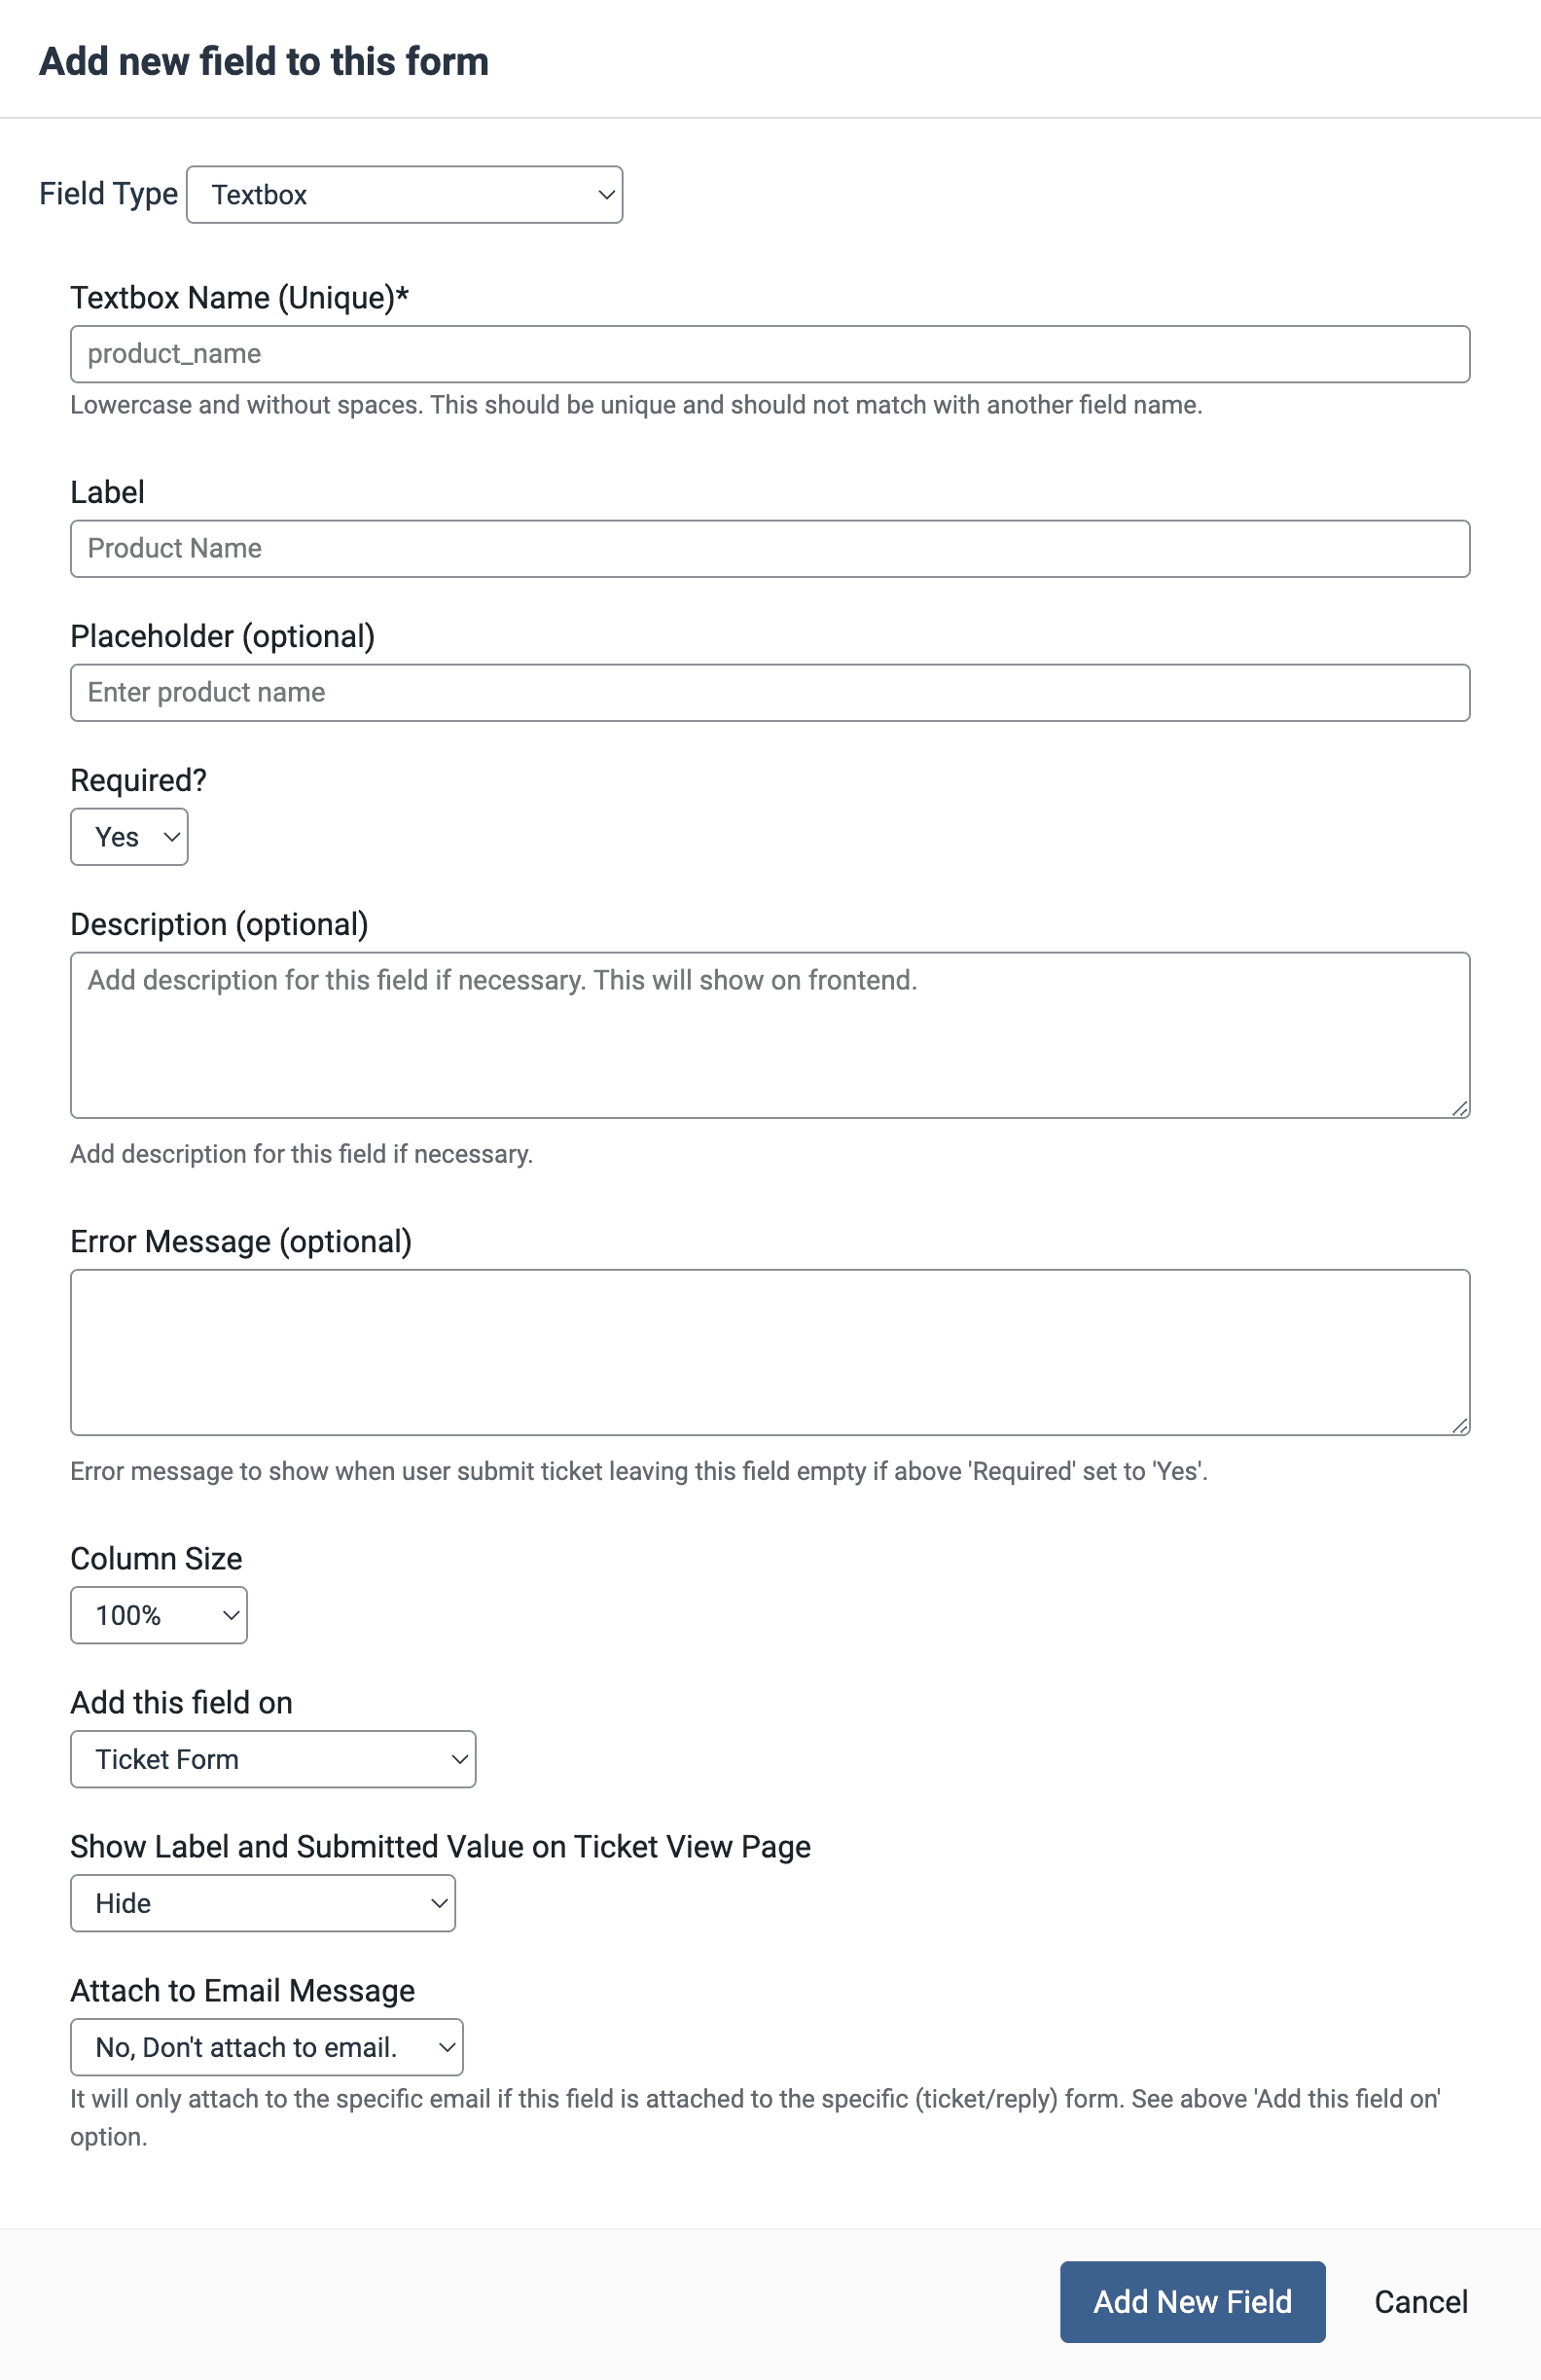
- Textbox Name (Unique)*: Enter unique name for this custom field. This name should not match with any existing core and custom field. This name should be in lowercase with letters (a-z), numbers (0-9) and underscore (_) if necessary. Do not add any spaces and other special characters. This name is for Database purpose and it won't visible to front-end and emails notifications.
- Label: Enter a Label for this field. It will show as the field label on front-end and email notifications. To identify the input on email notifications, it's recommended to add a Label even if you add placeholder.
- Placeholder (optional): Enter placeholder for this field if necessary.
- Required?: Yes/No. If you select Yes, user will have to input on this field to submit ticket. If you user submit ticket without adding input to this field, user will see error message.
- Description (optional): You can give instructions to users about how they should add input to this field if necessary. This will show under the input field.
- Error Message (optional): Add error message to show to user if they didn't add any input to this field and if you selected Required? to Yes above.
- Column Size: Select column size for this field. If you select 100%, it will show on a single row. If you select this field and next field column size to 50%, both field will show in a single row with with 2 column.
- Add this field on: Select where you want to add this field. You can add this field on Ticket Creation Form or Reply Form or both.
- Show Label and Submitted Value on Ticket View Page: You can show/hide this field's input value on the ticket view page to the User (who submitted the ticket) or support Agent or both User and Agent.
- Attach to Email Message: You can choose whether to attach this field's input value on New Ticket/Reply or Both email notifications or not.
After done, click on Add New Field button to create new form field.