Navigation

Create and Assign Main Menu
- Read Create dropdown and mega menu for HikaShop and VirtueMart
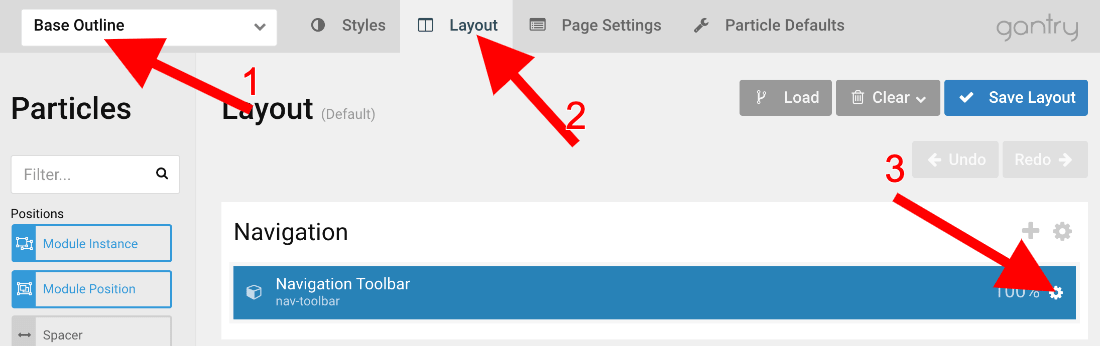
- From the Template Admin, click on Layout tab under Base Outline

- Scroll to the Navigation section and click (config icon) next to the Navigation Toolbar particle.
- Now follow Menu Options tab.
User Dropdown menu
From the Navigation Toolbar particle, follow User Dropdown menu tab.
HikaShop Search Module
- Download RCA Search for HikaShop package from your download area of this site.
- Follow the documentation for this package at RCA Search for HikaShop.
- Module Position: r-search (Copy and paste, then press Enter on your keyboard.)
- Menu Assignment: On all pages
VirtueMart Search Module
- Download VirtueMart Category Search module from your download area of RcaTheme.com if you're not using Quickstart package.
- Install the package you have downloaded using Joomla!'s default extension installer.
- Go to Extensions > Modules
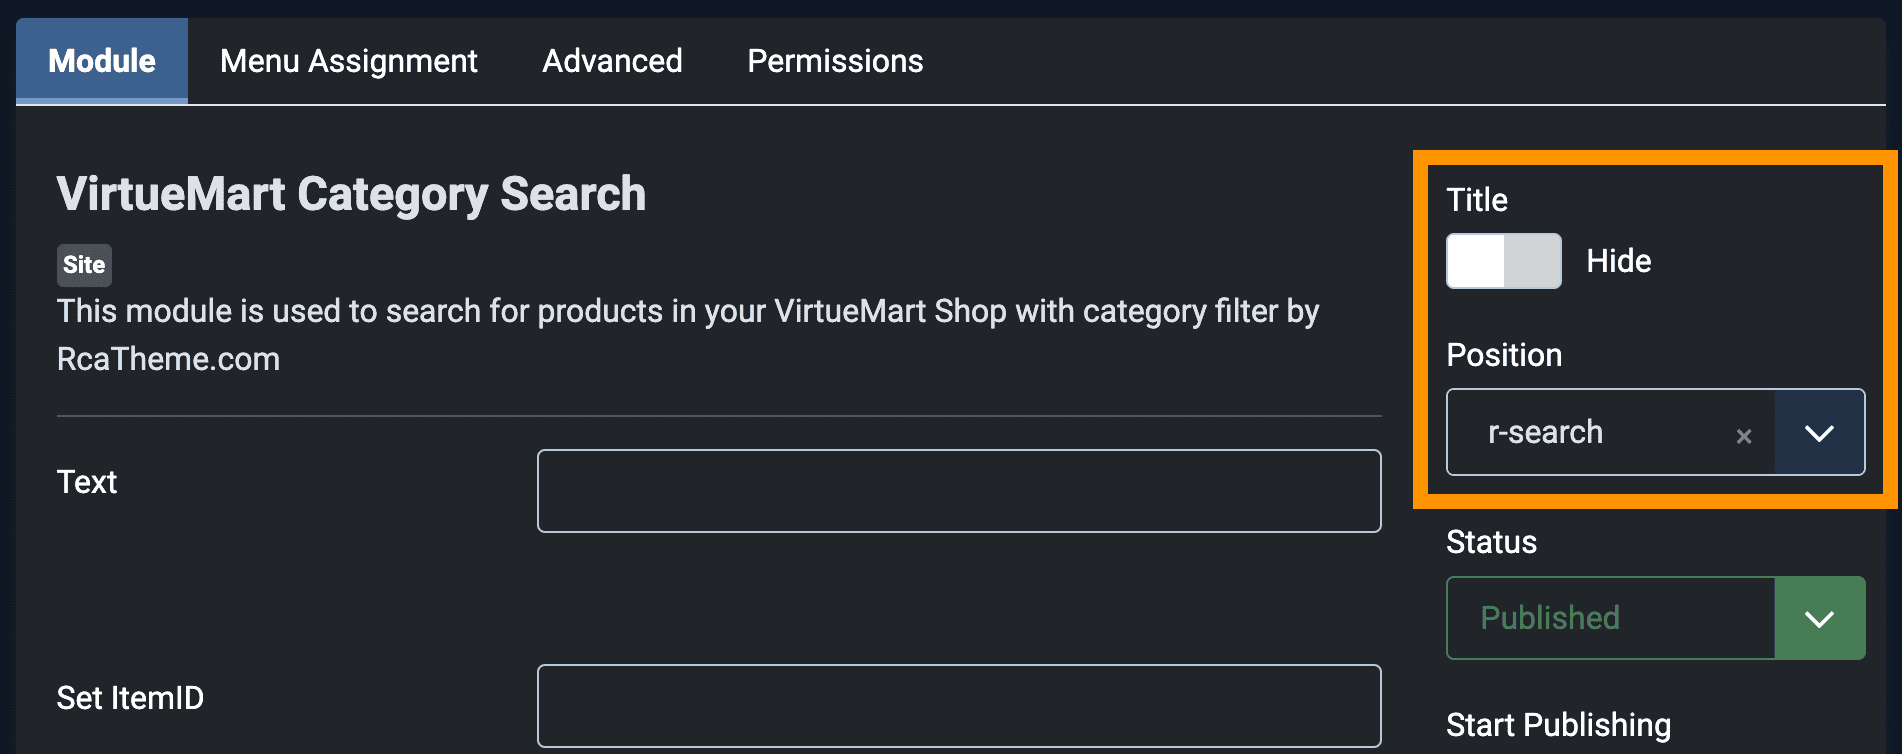
- Click on New to create new module and select VirtueMart Category Search
- Module Position: r-search (Copy and paste, then press Enter on your keyboard.)
- Menu Assignment: On all pages
- Now follow on screen instructions and setup.
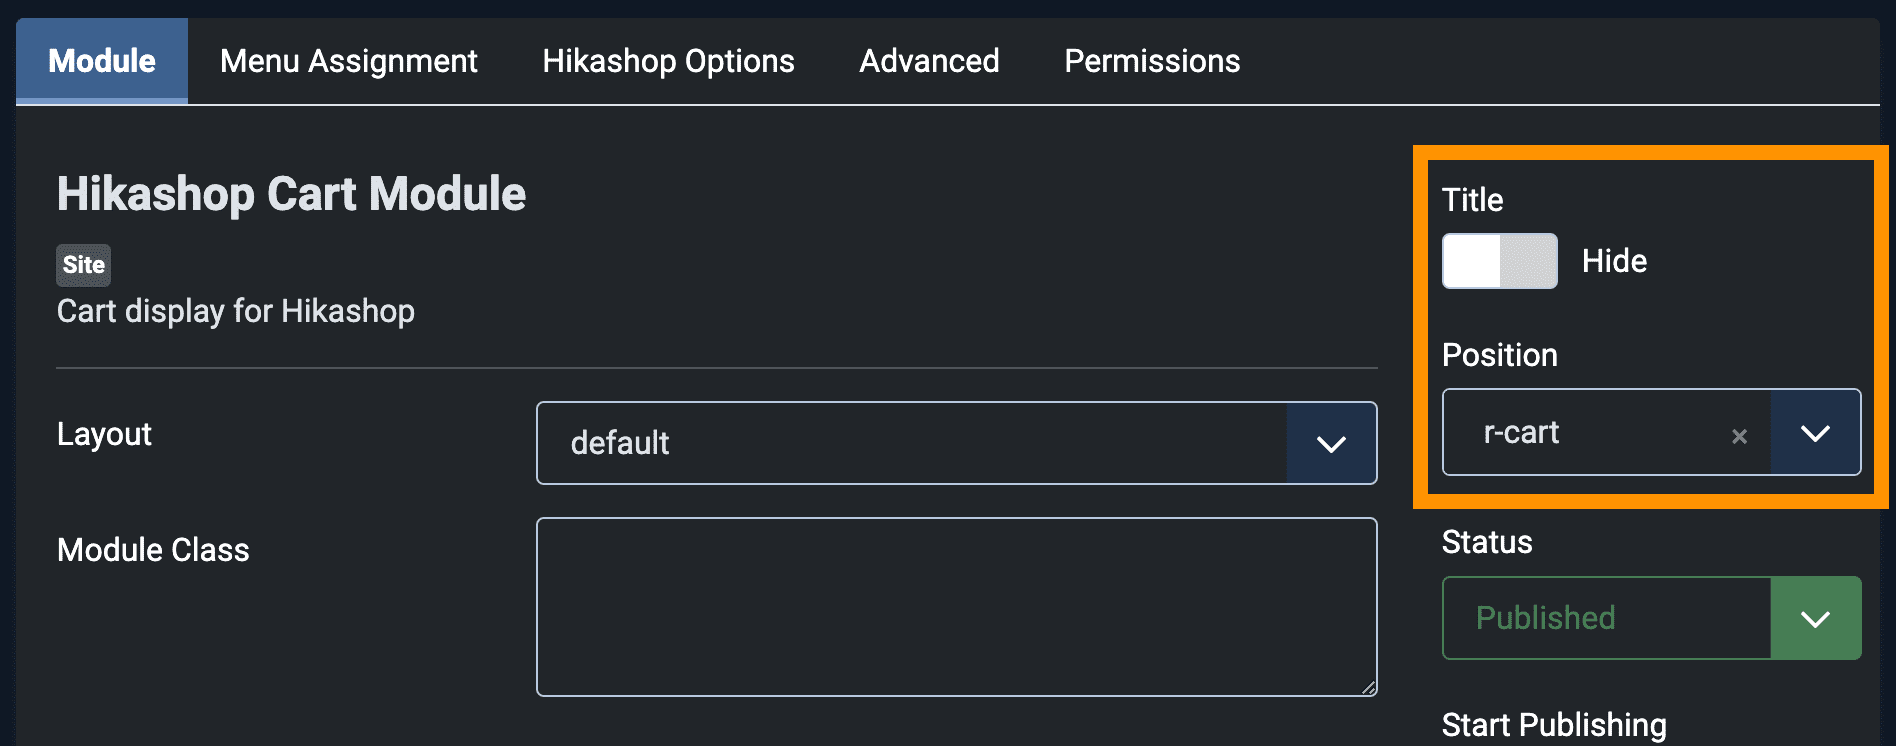
HikaShop Cart Module
- Navigate to Content -> Site Modules in the left menu.
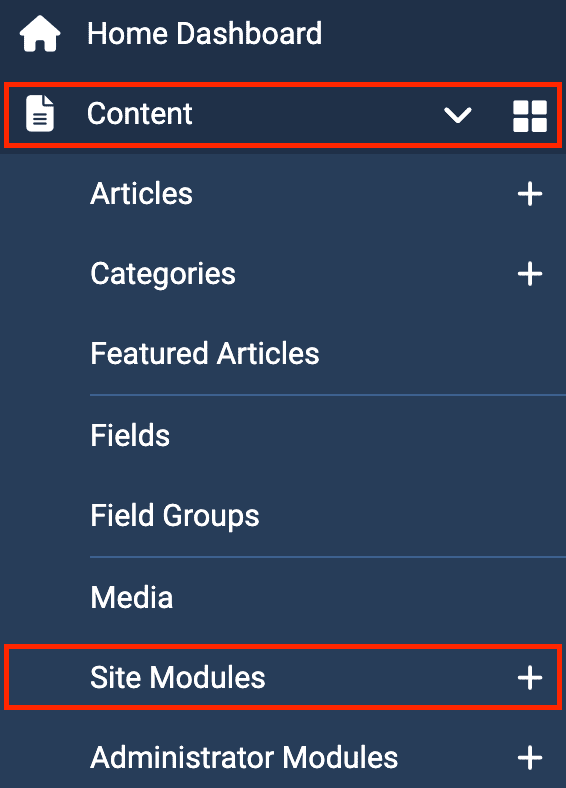
- Click on New button and select HikaShop Cart Module
- Module Position: r-cart (Copy and paste, then press Enter on your keyboard.)
- Menu Assignment: On all pages
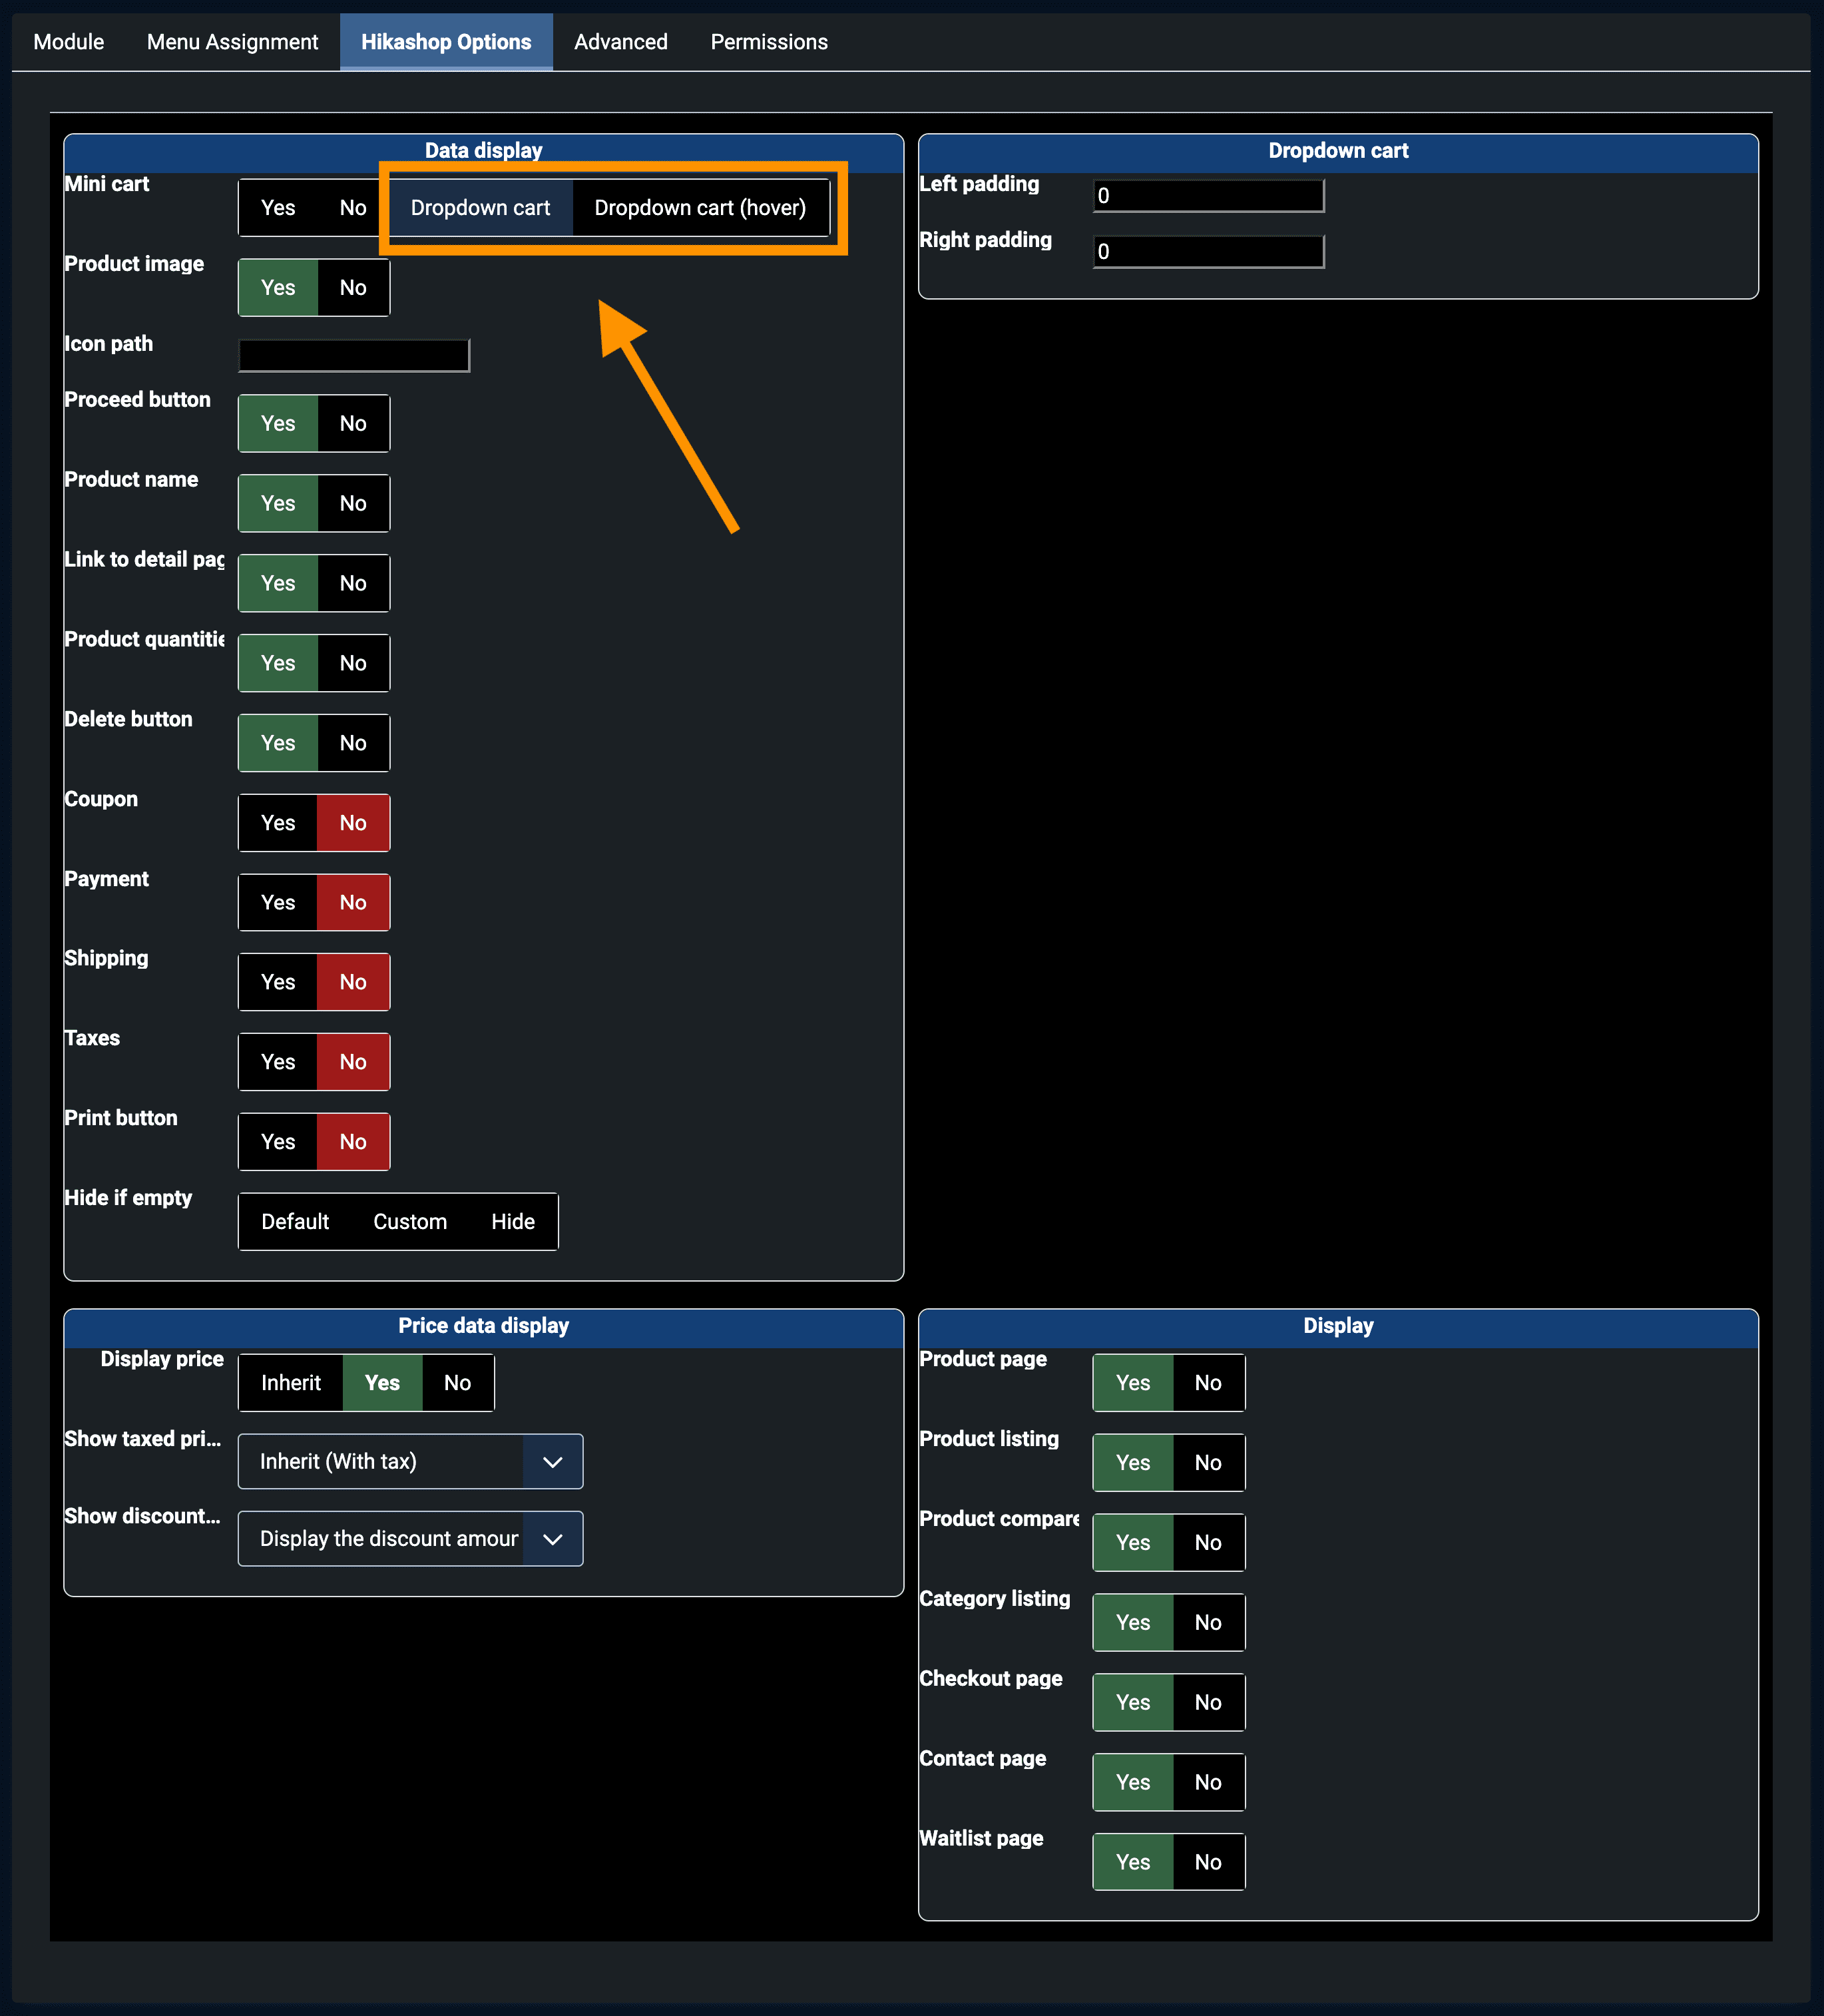
- Now follow screenshots and setup-
VirtueMart Cart Module
- Download mod_virtuemart_minicart_v.x.x.x.zip module from your download area of this site.
- Install using Joomla!'s default extension installer.
- From the Modules manager, click on New button to create new module
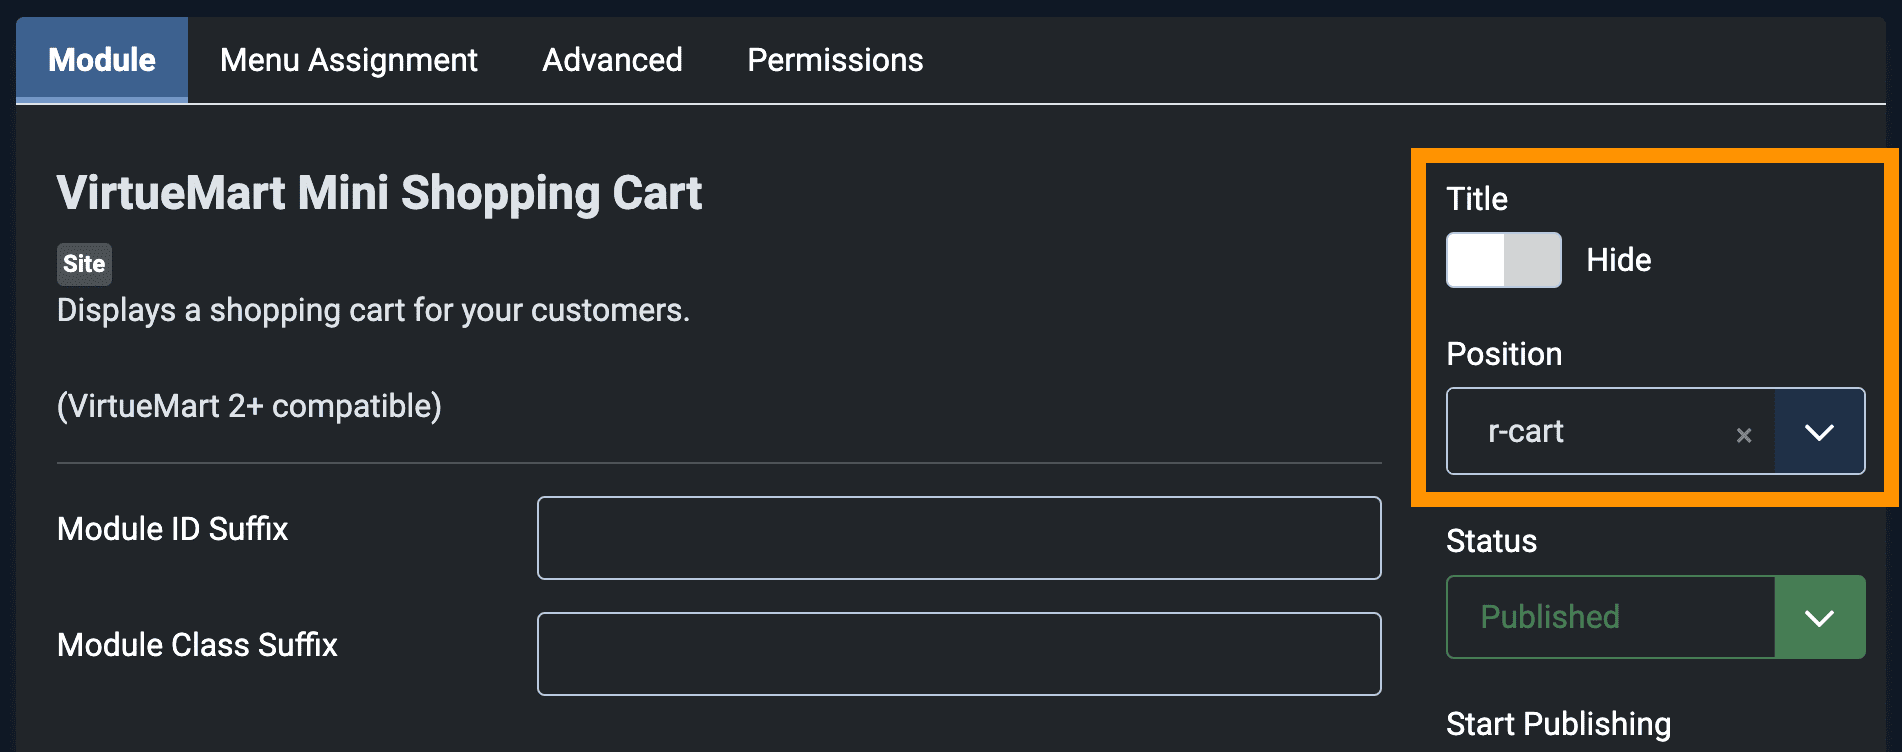
- Select VirtueMart Mini Shopping Cart
- Module Position: r-cart (Copy and paste, then press Enter on your keyboard.)
- Menu Assignment: On all pages
- Now follow screenshots and setup-