Gantry 5 Particle - Ajax Mailchimp Documentation
MailChimp is an email service offered through the URL www.mailchimp.com website that allows you to create, send, and manage email newsletters. Millions of people and businesses around the world use MailChimp for email marketing.
Ajax Mailchimp particle supports subscribing to your Mailchimp newsletter from your website through an Ajax request without page reload and translatable error or success messages.
Installation:
Note: Check your theme's existing particles first. If you already have this particle there, then skip this installation unless you need to update to a latest version.
- Download Ajax Mailchimp particle from particles download area of RcaTheme.com
- Unzip/Extract the particle zip file on your PC and open the folder
- Copy
particlesfolders to-- On Joomla:
ROOT/templates/DEFAULT_TEMPLATE/using an FTP client like FileZilla or using your cPanel File manager - On WordPress:
ROOT/wp-content/themes/DEFAULT_THEME/ - On Grav CMS:
ROOT/user/data/gantry5/themes/DEFAULT_THEME/
- On Joomla:
- Now it will copy/create required directories and files for this particle. If you're updating this particle to a latest version you need to confirm on the replace warning notification.
Usage:
Read how to add particles to your website here.
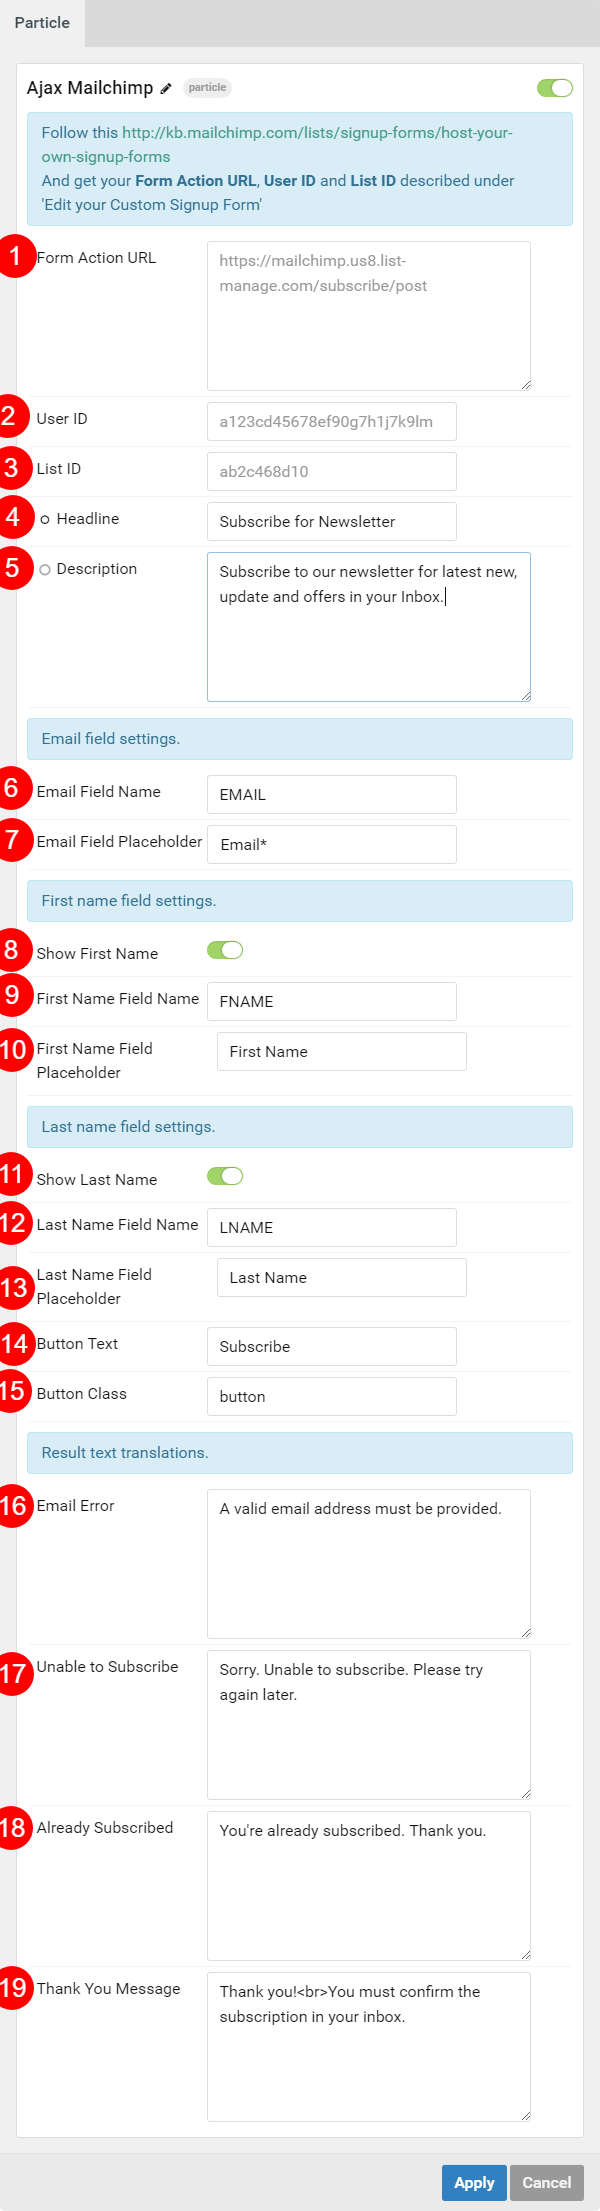
- Form Action URL: go to https://kb.mailchimp.com/lists/signup-forms/host-your-own-signup-forms and follow their instructions. After creating your sign up form, copy form
actionURL(red text) here, example: (as shown on the docs)<form action="https://mailchimp.us8.list-manage.com/subscribe/post" method="POST"> - User Id: Copy user id(red text) from the sign up form. Example:
<input type="hidden" name="u" value="a123cd45678ef90g7h1j7k9lm" /> - List Id: Copy list id(red text) from the sign up form. Example:
<input type="hidden" name="id" value="ab2c468d10" /> - Headline: You can add a headline and it will show before the sign up form.
- Description: You and a description and it will show after the Headline.
- Email Field Name: Copy email field name from your Mailchimp sign up form to here.
- Email Field Placeholder: Customize the placeholder text as you want.
- Show First Name: Enable/Disable First name field.
- First Name Field Name: Copy First Name/fname field name from your Mailchimp sign up form.
- First Name Field Placeholder: Customize the placeholder text as you want.
- Show Last Name: Enable/Disable First name field.
- Last Name Field Name: Copy Last Name/lname field name from your Mailchimp sign up form.
- Last Name Field Placeholder: Customize the placeholder text as you want.
- Button Text: Customize subscribe button text.
- Button Class: Add CSS class for subscribe button.
- Email Error: Customize error message for invalid email addresses.
- Unable to Subscribe: Customize unable to subscribe message.
- Already Subscribed: Customize already subscribed message.
- Thank You Message: Customize thank you message after a successful subscription.