How to Install RcaTheme's Joomla! Quickstart Package?
Highly recommended for those creating a new website with this template. If you plan to change the template on your existing website, please refer to the documentation at How to Install RcaTheme Joomla! Template?
What is Quickstart Package?
The Quickstart Package is a comprehensive Joomla! installation that incorporates the core Joomla! files along with the template, extensions, particles and sample demo data mirroring the content seen on the demo site. Upon installing the Quickstart, it duplicates the entire setup, including demo data and configurations, facilitating a seamless start to your customization process.
Installation of the RcaTheme's Joomla! Quickstart Package:
To install the Quickstart package, follow these steps:
- Download the Quickstart Package.
- Local Development Environments.
- Configure the Required PHP settings.
- Get ready to install the Quickstart Package on your localhost.
- Get ready to install the Quickstart Package on the live server.
- Create database.
- Start installation.
- Uninstall HikaShop or VirtueMart.
- Update the Template and Extensions.
Download the Quickstart Package:
- Login to your RcaTheme.com account and navigate to Downloads page.
- Now download the Quickstart package for the template you're going to install.
Local Development Environments:
Local development is the preferred method for working with any Joomla!-based new websites as it enables faster development iterations due to superior performance and convenience. The following is a list of suitable server setups that can be installed locally on your computer:
- MAMP & MAMP PRO (Windows and Mac OS X)
- XAMPP (Windows, Mac OS X and Linux)
- WampServer (Windows)
- EasyPHP (Windows)
Configure the Required PHP settings:
There are specific PHP settings that must meet the requirements for Joomla installation. Typically, these settings are located in a php.ini or user.ini configuration file on the server. If you're using shared hosting, inquire with your hosting service about changing these settings, if possible. However, if you're working on a localhost (e.g., with XAMPP) or a VPS or dedicated host, you should have the flexibility to adjust these settings yourself.
Below are the minimum values for the php.ini file:
- memory_limit: 256M
- upload_max_filesize: 30M
- post_max_size: 30M
- max_execution_time: 30 (set to 200 if you're using localhost)
It is possible to work with lower values of upload_max_filesize and post_max_size but larger extensions will fail to upload and cause unpredictable problems.
Get ready to install the Quickstart Package on your localhost:
- Creating a new site directory:
- Navigate to the web root directory on your localhost.
- For XAMPP and MAMP, the default directory is named "htdocs." You can find it within the XAMPP/MAMP installation directory.
- For WampServer, the default directory is named "www." It is also located in the installation directory of WampServer.
- Create a new folder or directory; let's call it shop (you can use any).
- Copy the Quickstart package zip file to the shop folder.
- Extract/Unzip the Quickstart package zip file.
- Delete the Quickstart package zip file.
Get ready to install the Quickstart Package on the live server:
There are two commonly used options for uploading the Quickstart package file to your server.
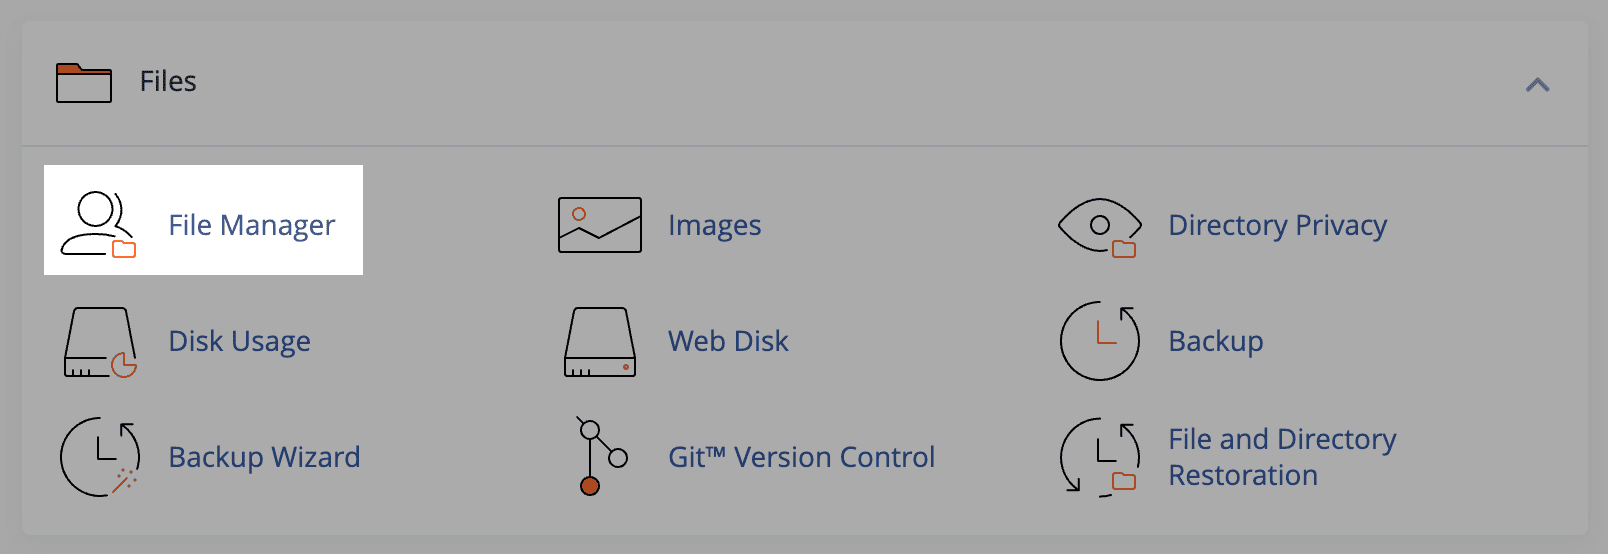
- Upload using cPanel's File Manager:
The best option is to use cPanel. If your hosting includes cPanel, you can upload the Quickstart Package archive to your public_html folder and extract it there. This minimizes the risk of any potential Joomla file losses.
- Login to your cPanel
- Click on File Manager
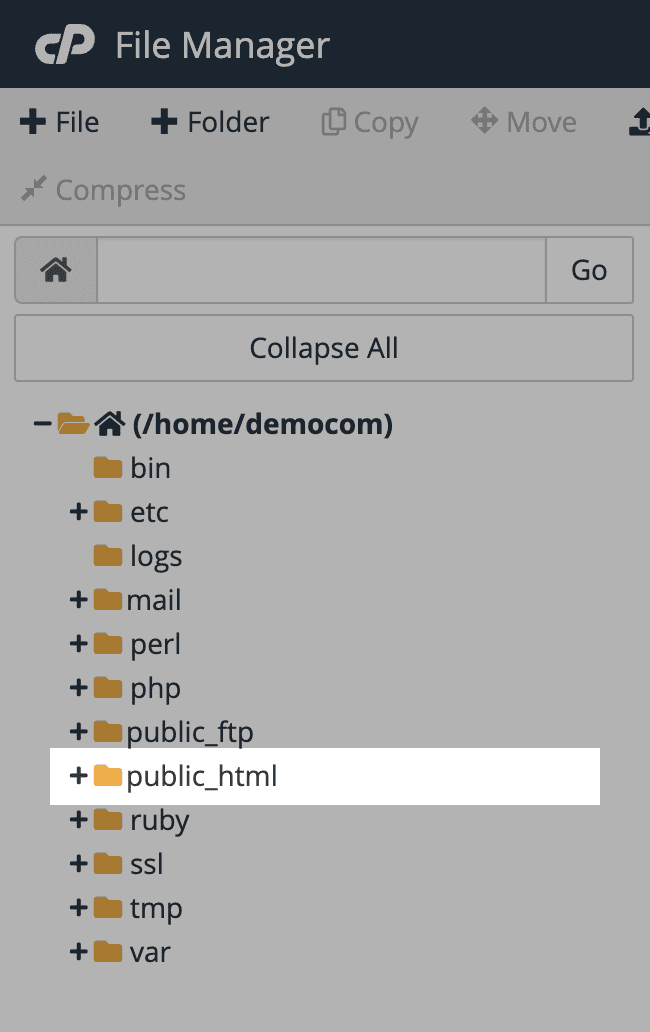
- Select public_html or any other folder you want to install.
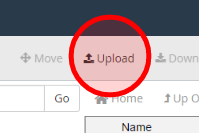
- Click on the Upload button
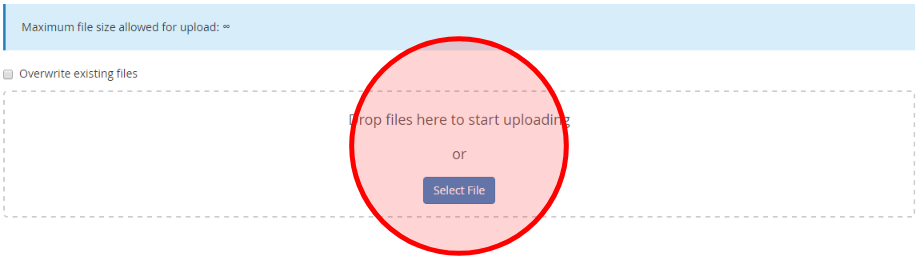
- Select or Drag & drop the Quickstart package file
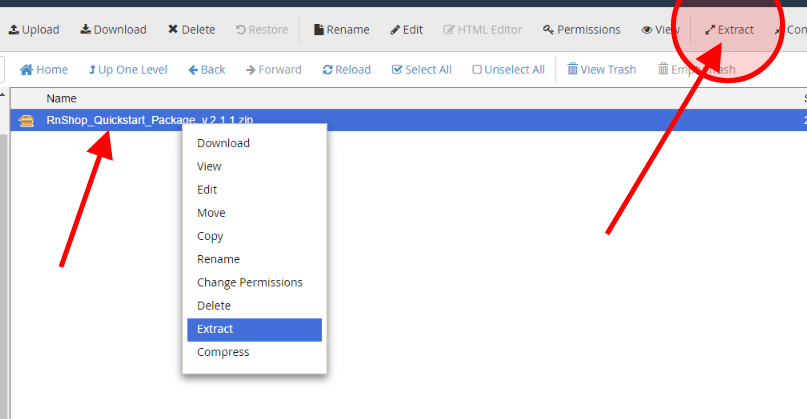
- After finish go back to File Manager
- Select the Quickstart zip file you just uploaded, and then click on Extract. There are two ways to extract. One is to right-click on the zip file and then select Extract from the menu. The other is to left-click on the zip file, then click the Extract button at the top of the File Manager.
- Upload using an FTP client:
- Extract/Unzip the Quickstart package ZIP file on your PC.
- Log in to your hosting server using an FTP client such as FileZilla.
- Navigate to the "public_html" directory or the directory where you want to install.
- Upload the Quickstart package files that you have just unzipped.
Create database:
A functioning database name, database hostname, database username, and user's password are required for every Joomla! CMS installation. Joomla! will store its articles, menus, users, and extensions data in the database.
Follow the instructions below to obtain a database name, database username, and database password:
- Create a Database using phpMyAdmin on localhost.
- Create a Database using MySQL Database Wizard on cPanel.
- If your hosting doesn't support cPanel but has phpMyAdmin, please follow the steps to Create a Database using phpMyAdmin on localhost
- If your hosting doesn't support cPanel and phpMyAdmin, please refer to the documentation of your hosting control panel or contact your hosting provider.
Start Installation:
Now you are ready to install Joomla (Quickstart package).
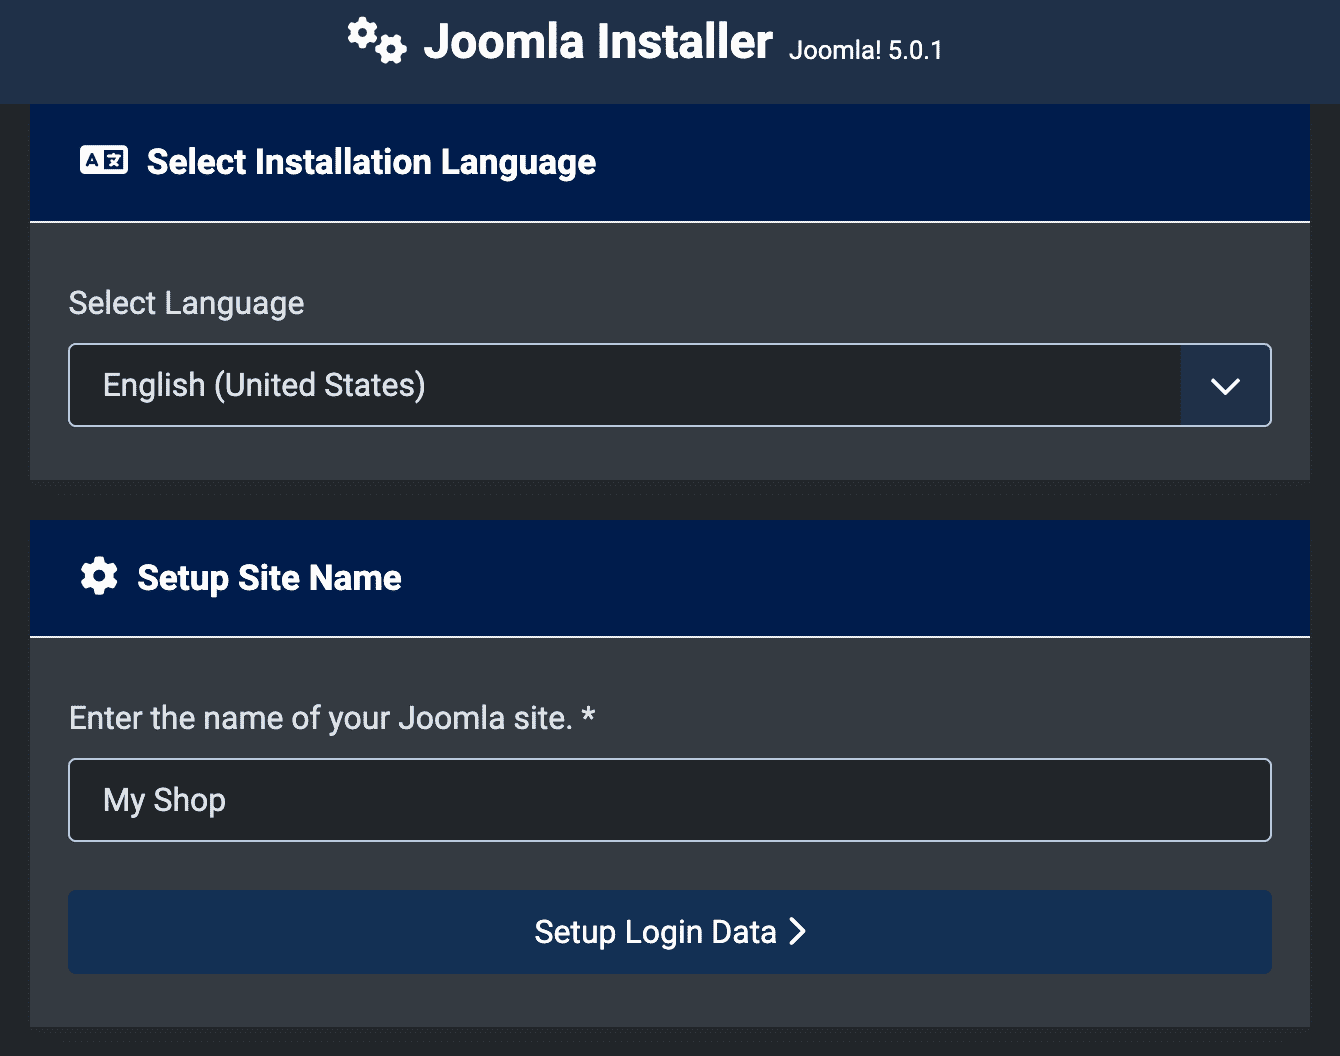
Initiate the Joomla! web installer by opening your favourite browser and navigating to the site's domain name. If you're installing on a live hosting server, use http://www.yoursitename.com. If you are installing Joomla! on localhost, use http://localhost/shop (or the directory where you have copied the Quickstart package), and you should see the installation screen.
Joomla will try to identify the Select Language field automatically from your browser's language. You can change this if needed.
Fill in the following information.
- Site Name: The name of your website — this can be changed at any point later in the Site Global Configuration page.
When everything on the first page is completed, click the Setup Login Data button to proceed.
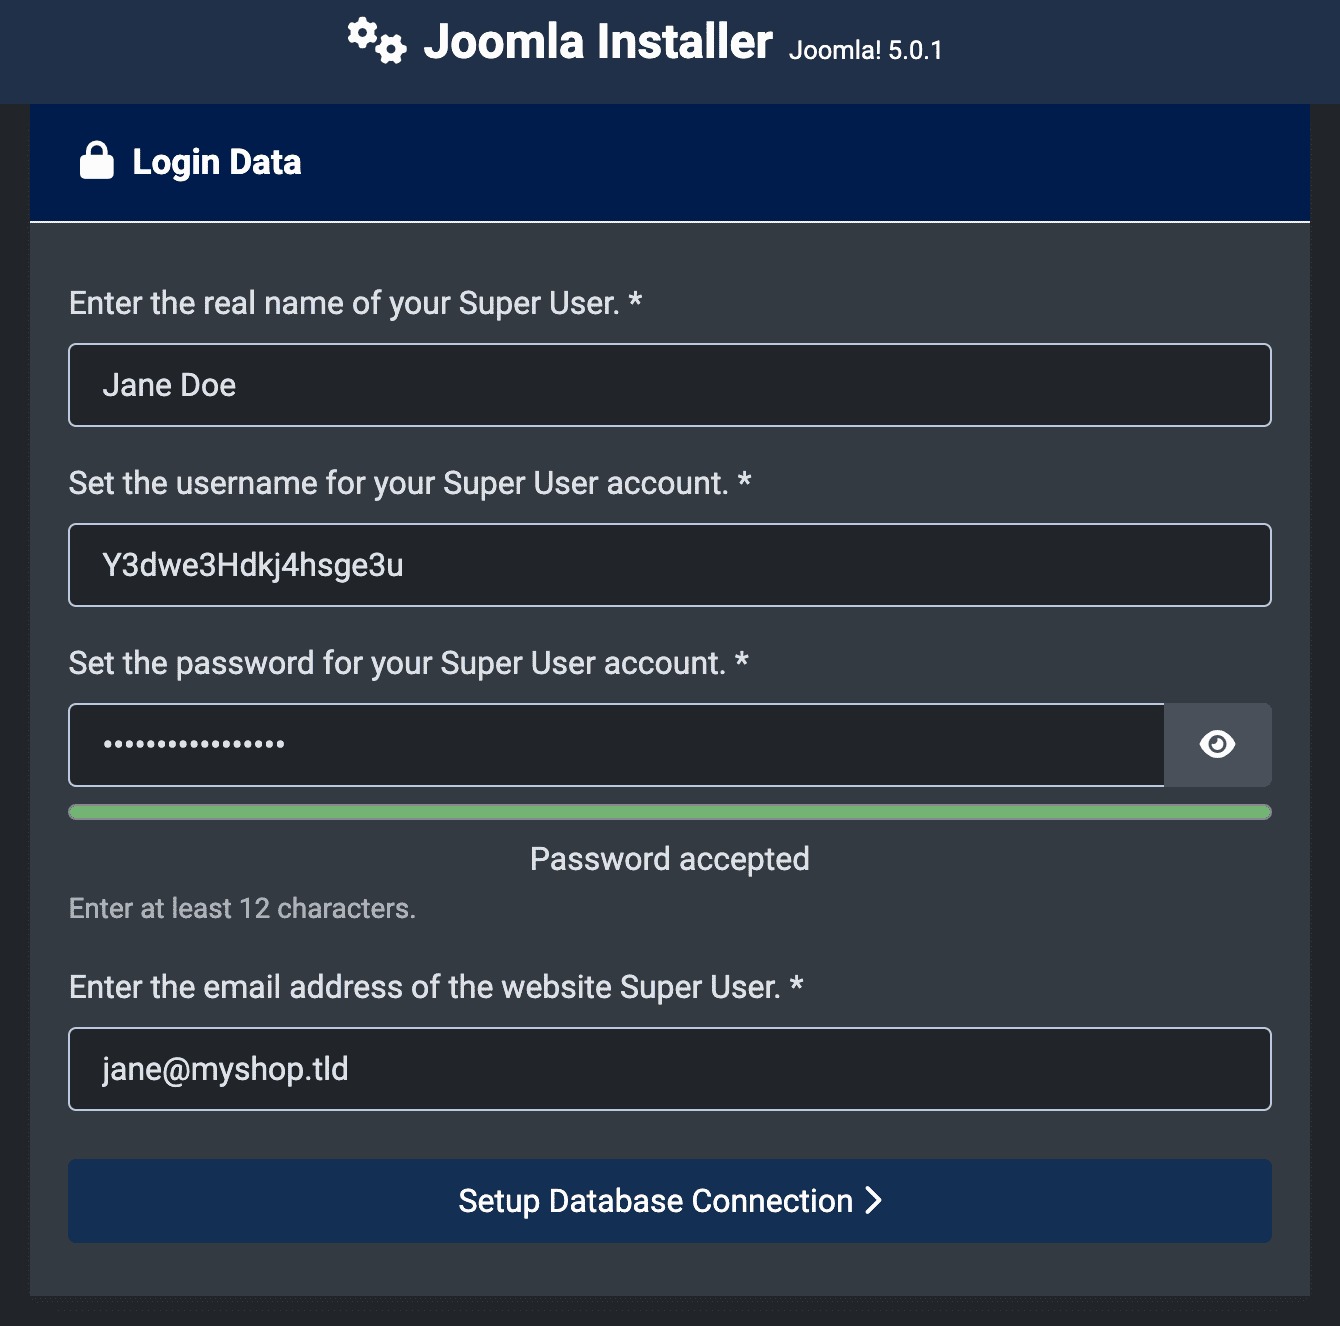
Login Data
You should now see the login data screen.
Fill in the following information.
- Enter the real name of your Super User. *: The name of the Super User. This is how Joomla! will greet you when you log in.
- Set the username for your Super User account. *: The username for the Super User. Avoid using admin (a good Security measure) or use My Profile in the Administration interface to change it later.
- Set the password for your Super User account. *: Remember that a Super User has maximum control of the Site and Administrator interfaces, so use a difficult password. Use My Profile in the Administration interface to change it later.
- Enter the email address of the website Super User. *: The Super User email address. Enter a valid email in case you forget your password. This is the email address where you'll receive a link to change the Super User password.
When everything on the second page is completed, click the Setup Database Connection button to proceed.
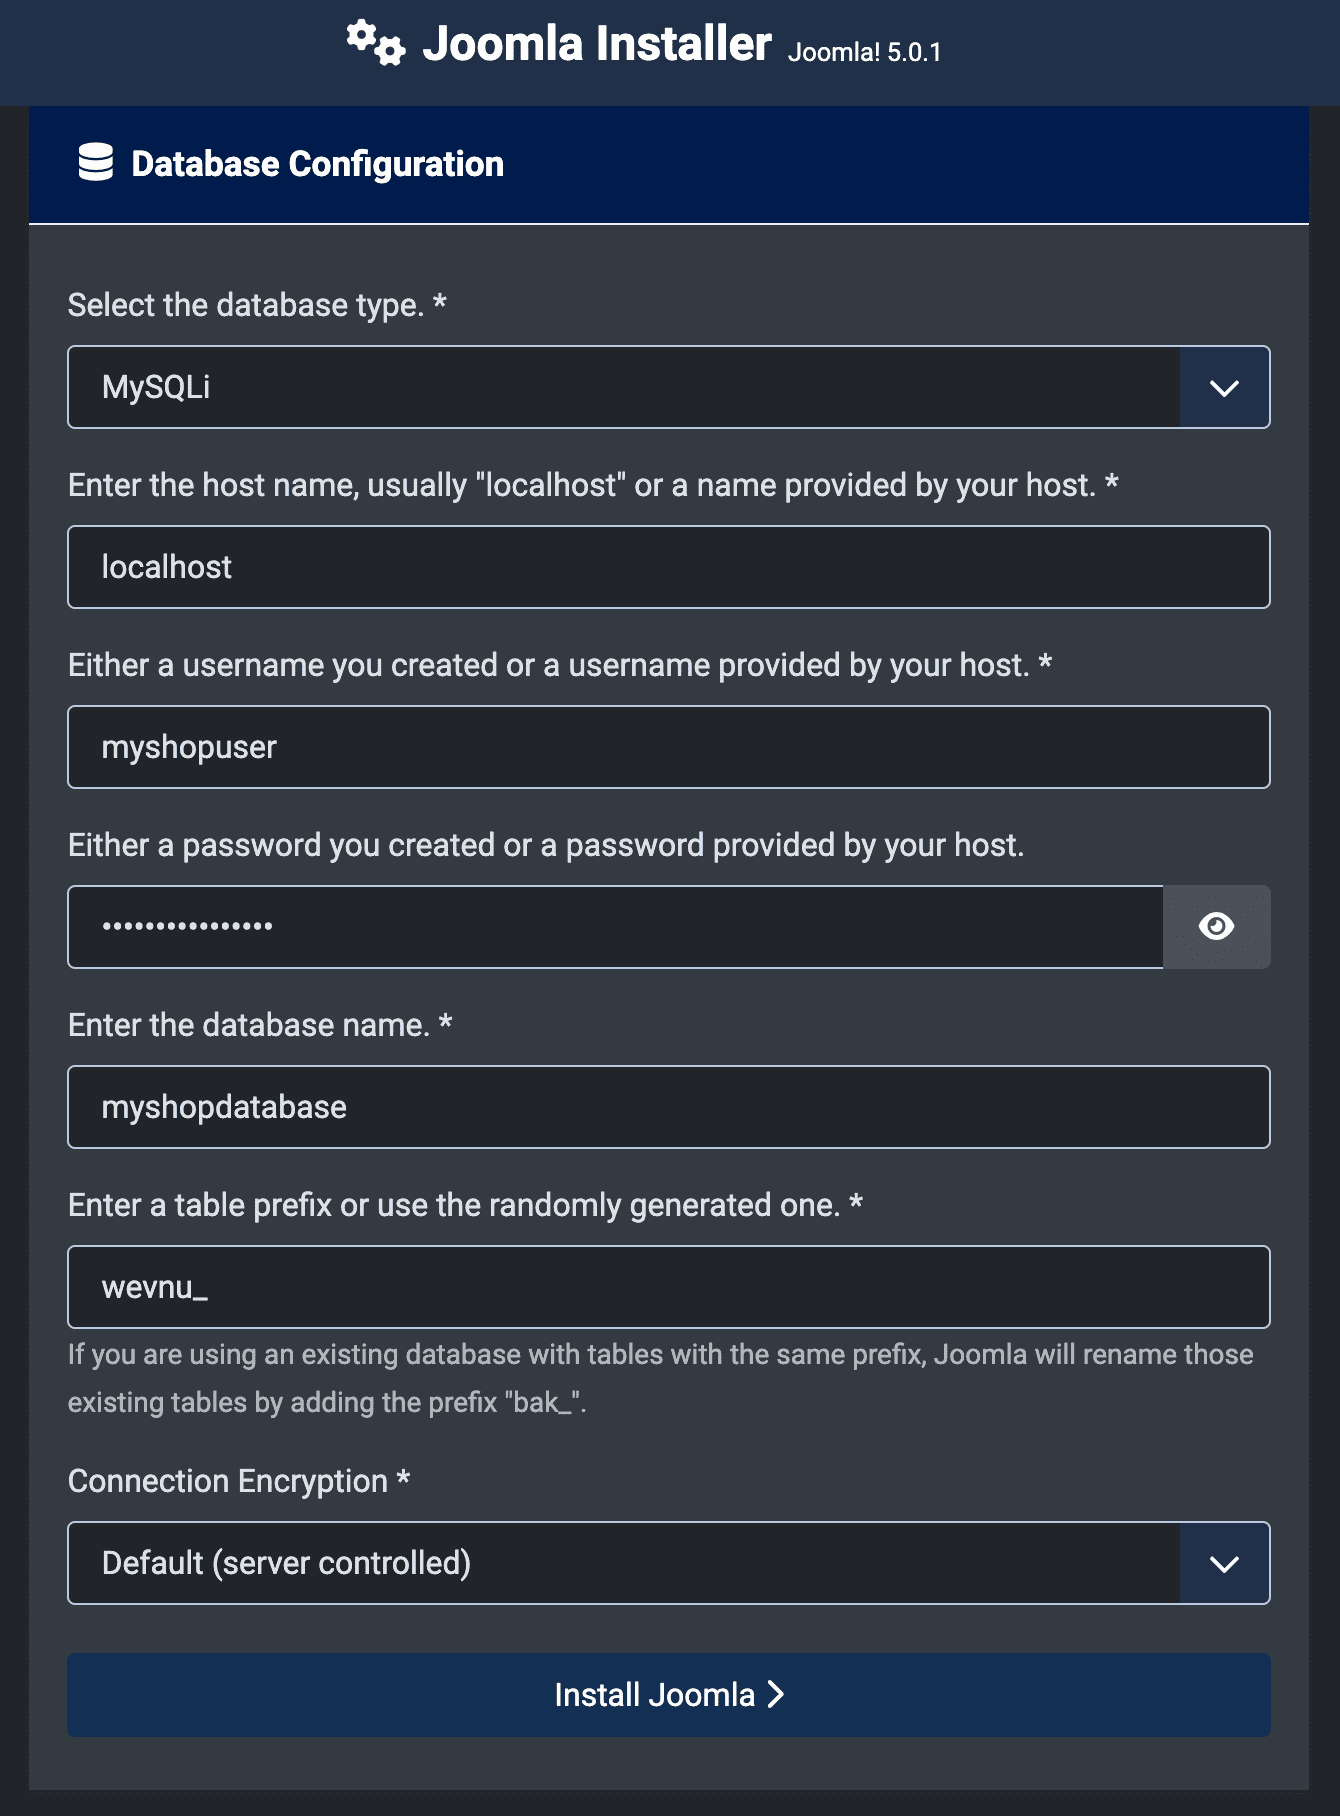
Database Configuration
Enter the database information noted down when you created the database for this installation. You may also read or review Creating a Database for Joomla!. For simplification, these instructions are a reference to installing with a MySQLi database. The instructions on the installation page are self explanatory, but here they are again:
- Select the database type. *: MySQLi is the common database used
- Enter the host name, usually "localhost" or a name provided by your host. *: Where your database is located. Common is localhost, even on hosting services. However, some hosts use a specific database server such as dbserver1.yourhost.com.
- Either a username you created or a username provided by your host. *: The username used to connect to the database
- Either a password you created or a password provided by your host: The password for the database user (not your Administrator password)
- Enter the database name. *: The name of the database
- Enter a table prefix or use the randomly generated one. *: This is generated automatically as a security feature. You can accept the randomly generated default or change it. Just don't forget to put the underscore character (_) at the end of the prefix.
- Connection Encryption *: Specifies how the connection to the database should be encrypted. If you don't know - then it's best to stick to the default. However this allows enterprises that use one or two way authentication for the database connection to provide it.
All these choices and more can be edited on the Site Global Configuration page, under Server Options after the installation is completed. Note, you will break your installation if you change these settings after installation unless you have a complete copy of the current database being used by the Joomla installation. Common uses would be to update the username and password of the database or to complete a move of an existing installation to a new host with different parameters.
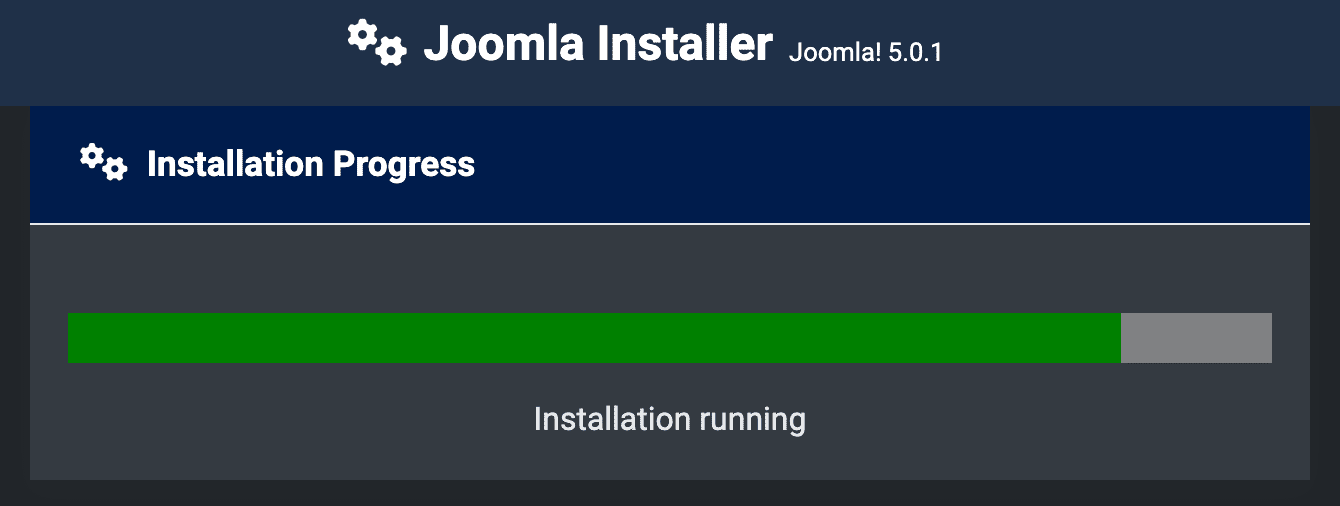
After you click the Install Joomla button, you should see the Joomla logo spinning. Once the installation completes, you should see the success page.
Wait for the Installation Progress to finish
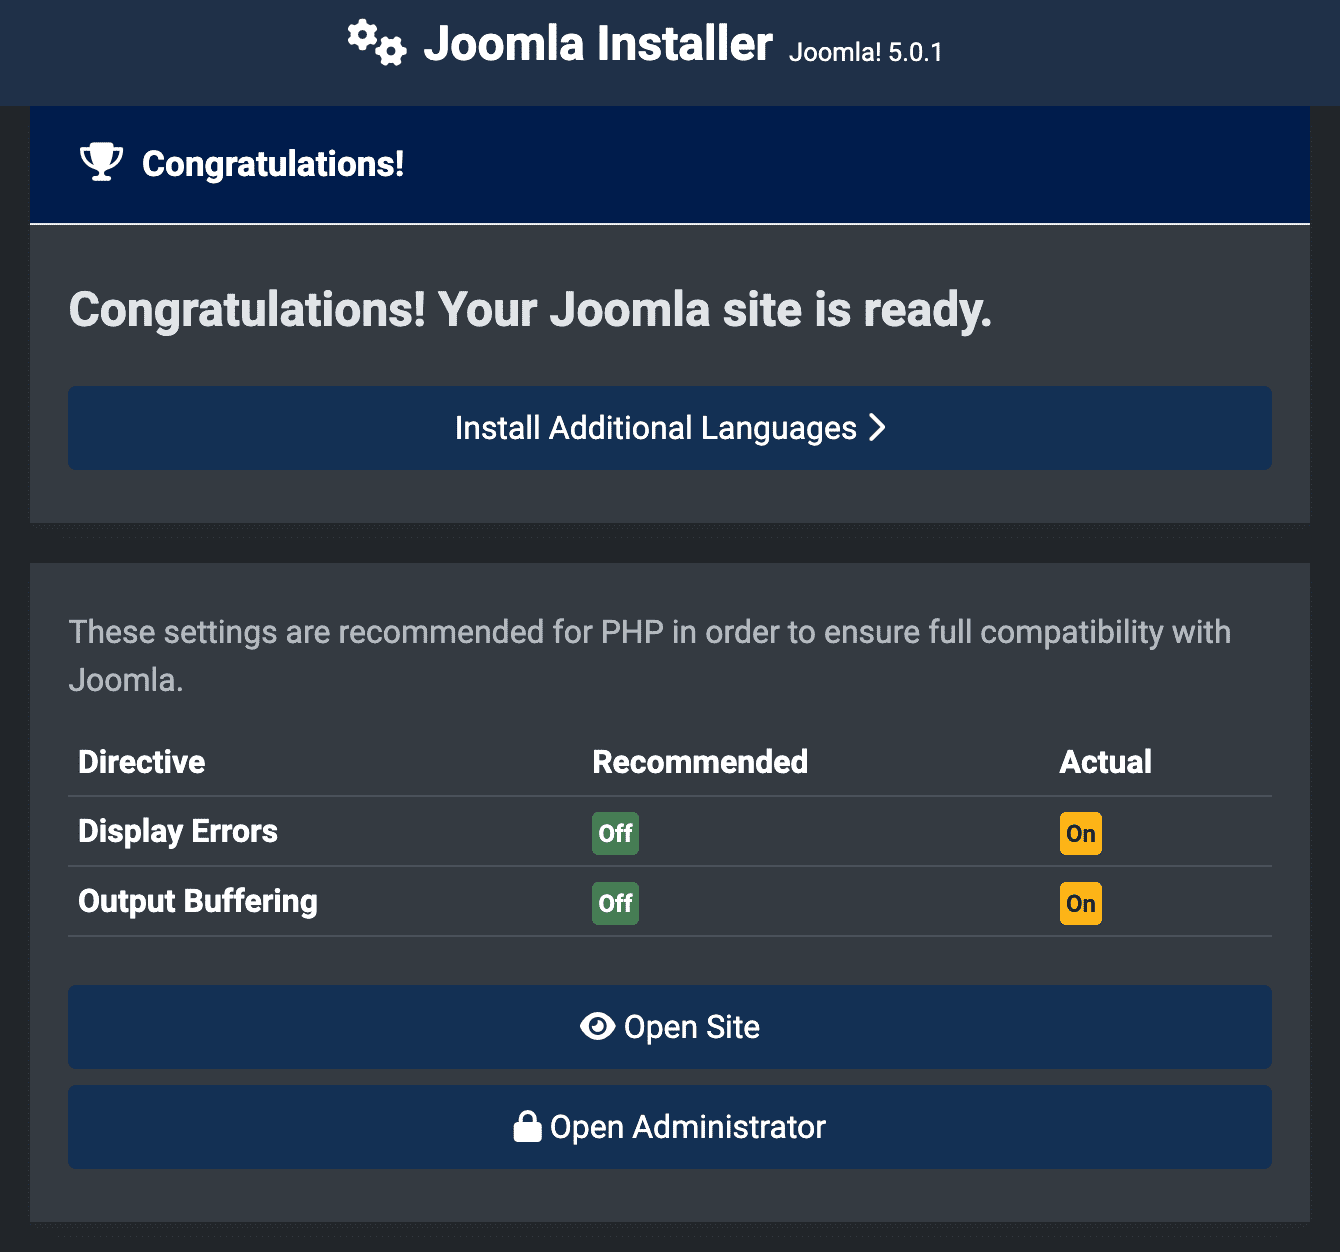
Finishing Up
Congratulations! the Joomla! Quickstart package is now installed.
If you want to start using Joomla! right away without installing extra languages you can select Open Administrator to go to the Administrator Dashboard or select Open Site to go to the Site Home page. You may see a section with recommended PHP settings.
Recommended Settings: These settings are recommended in your PHP configuration, but will not prevent Joomla! from being installed. You can refer to the above instructions on how they may be changed if there is a need to do so.
Extra Languages
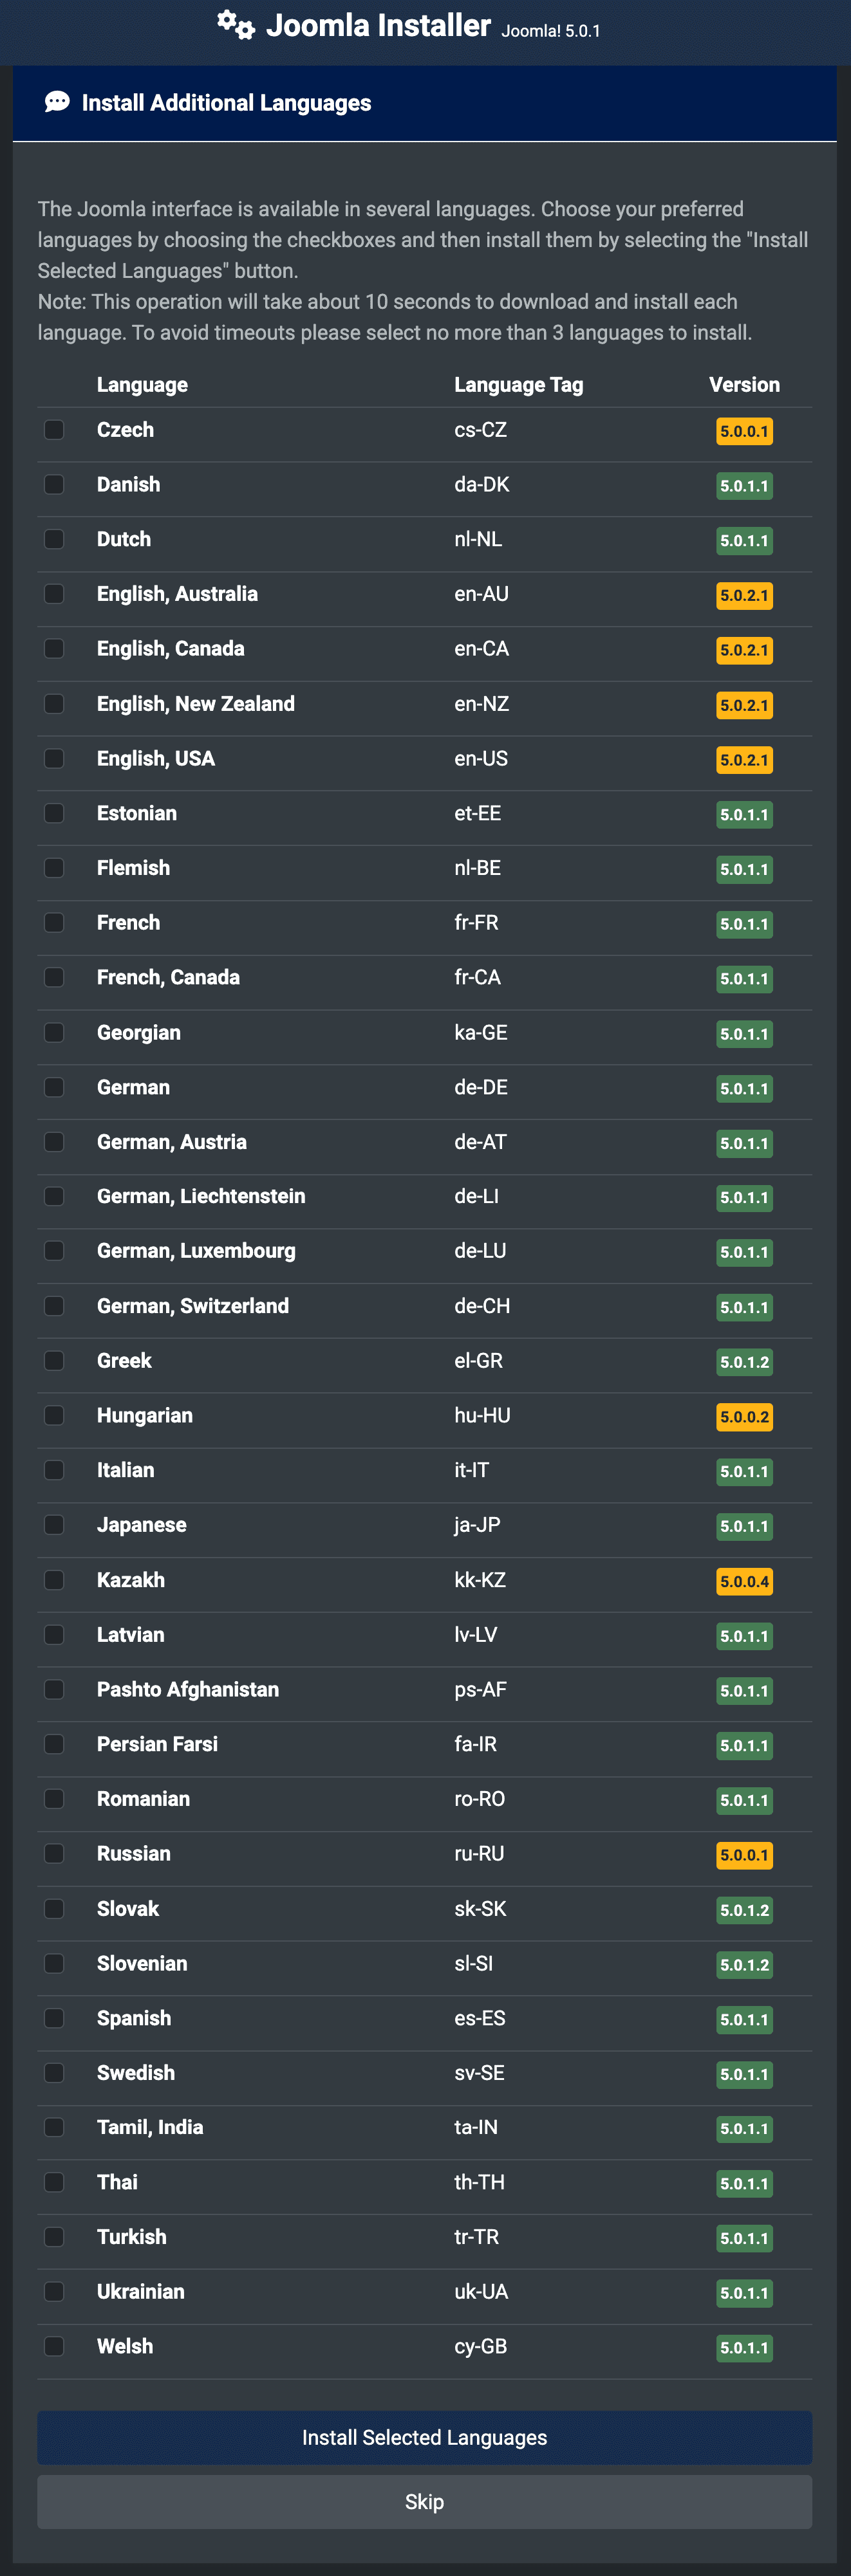
As part of the Joomla installation process you are given the opportunity to install additional languages before you complete the installation.
To do this click on the Install Additional Languages button
This will take you to an extra installation page allowing you to select the languages you require.
Install Additional Languages
A list of language packs is displayed.
Select up to 3 languages you wish to install. (More than 3 at once can cause timeout issues; you can install more later.)
Remember the following:
- Language packs included in custom distributions will not be listed at this stage as they are already installed.
- A version of the packs proposed will match the Joomla Major version (4.0.x, 4.1.x, etc.). The minor version of the pack may not correspond, e.g. you are installing version 4.0.3 and a 4.0.2 language pack is shown.
- Unmatched language packs in the above example may have untranslated strings.
- The unmatched language packs will be offered as an update when the packs are updated by the registered Translation teams. The available update will be shown in the Control panel as well as in Extensions Manager → Update. This behaviour is similar to Extensions Manager → Install Languages.
Click Next and a progress bar will be displayed while the language pack or packs are installed.
Choose the Default Language
When the installation of the languages is complete you will now be presented with a similar Congratulations! Your Joomla site is ready. screen. The difference will be a list of the installed languages allowing you to select the default language for the Site and the Administrator interface.
- Select the default language you wish to use.
- When you have selected the default language, click the Set default language button to confirm.
- A system message will be displayed confirming Joomla has set the default Administrator and Site language. That message can be closed.
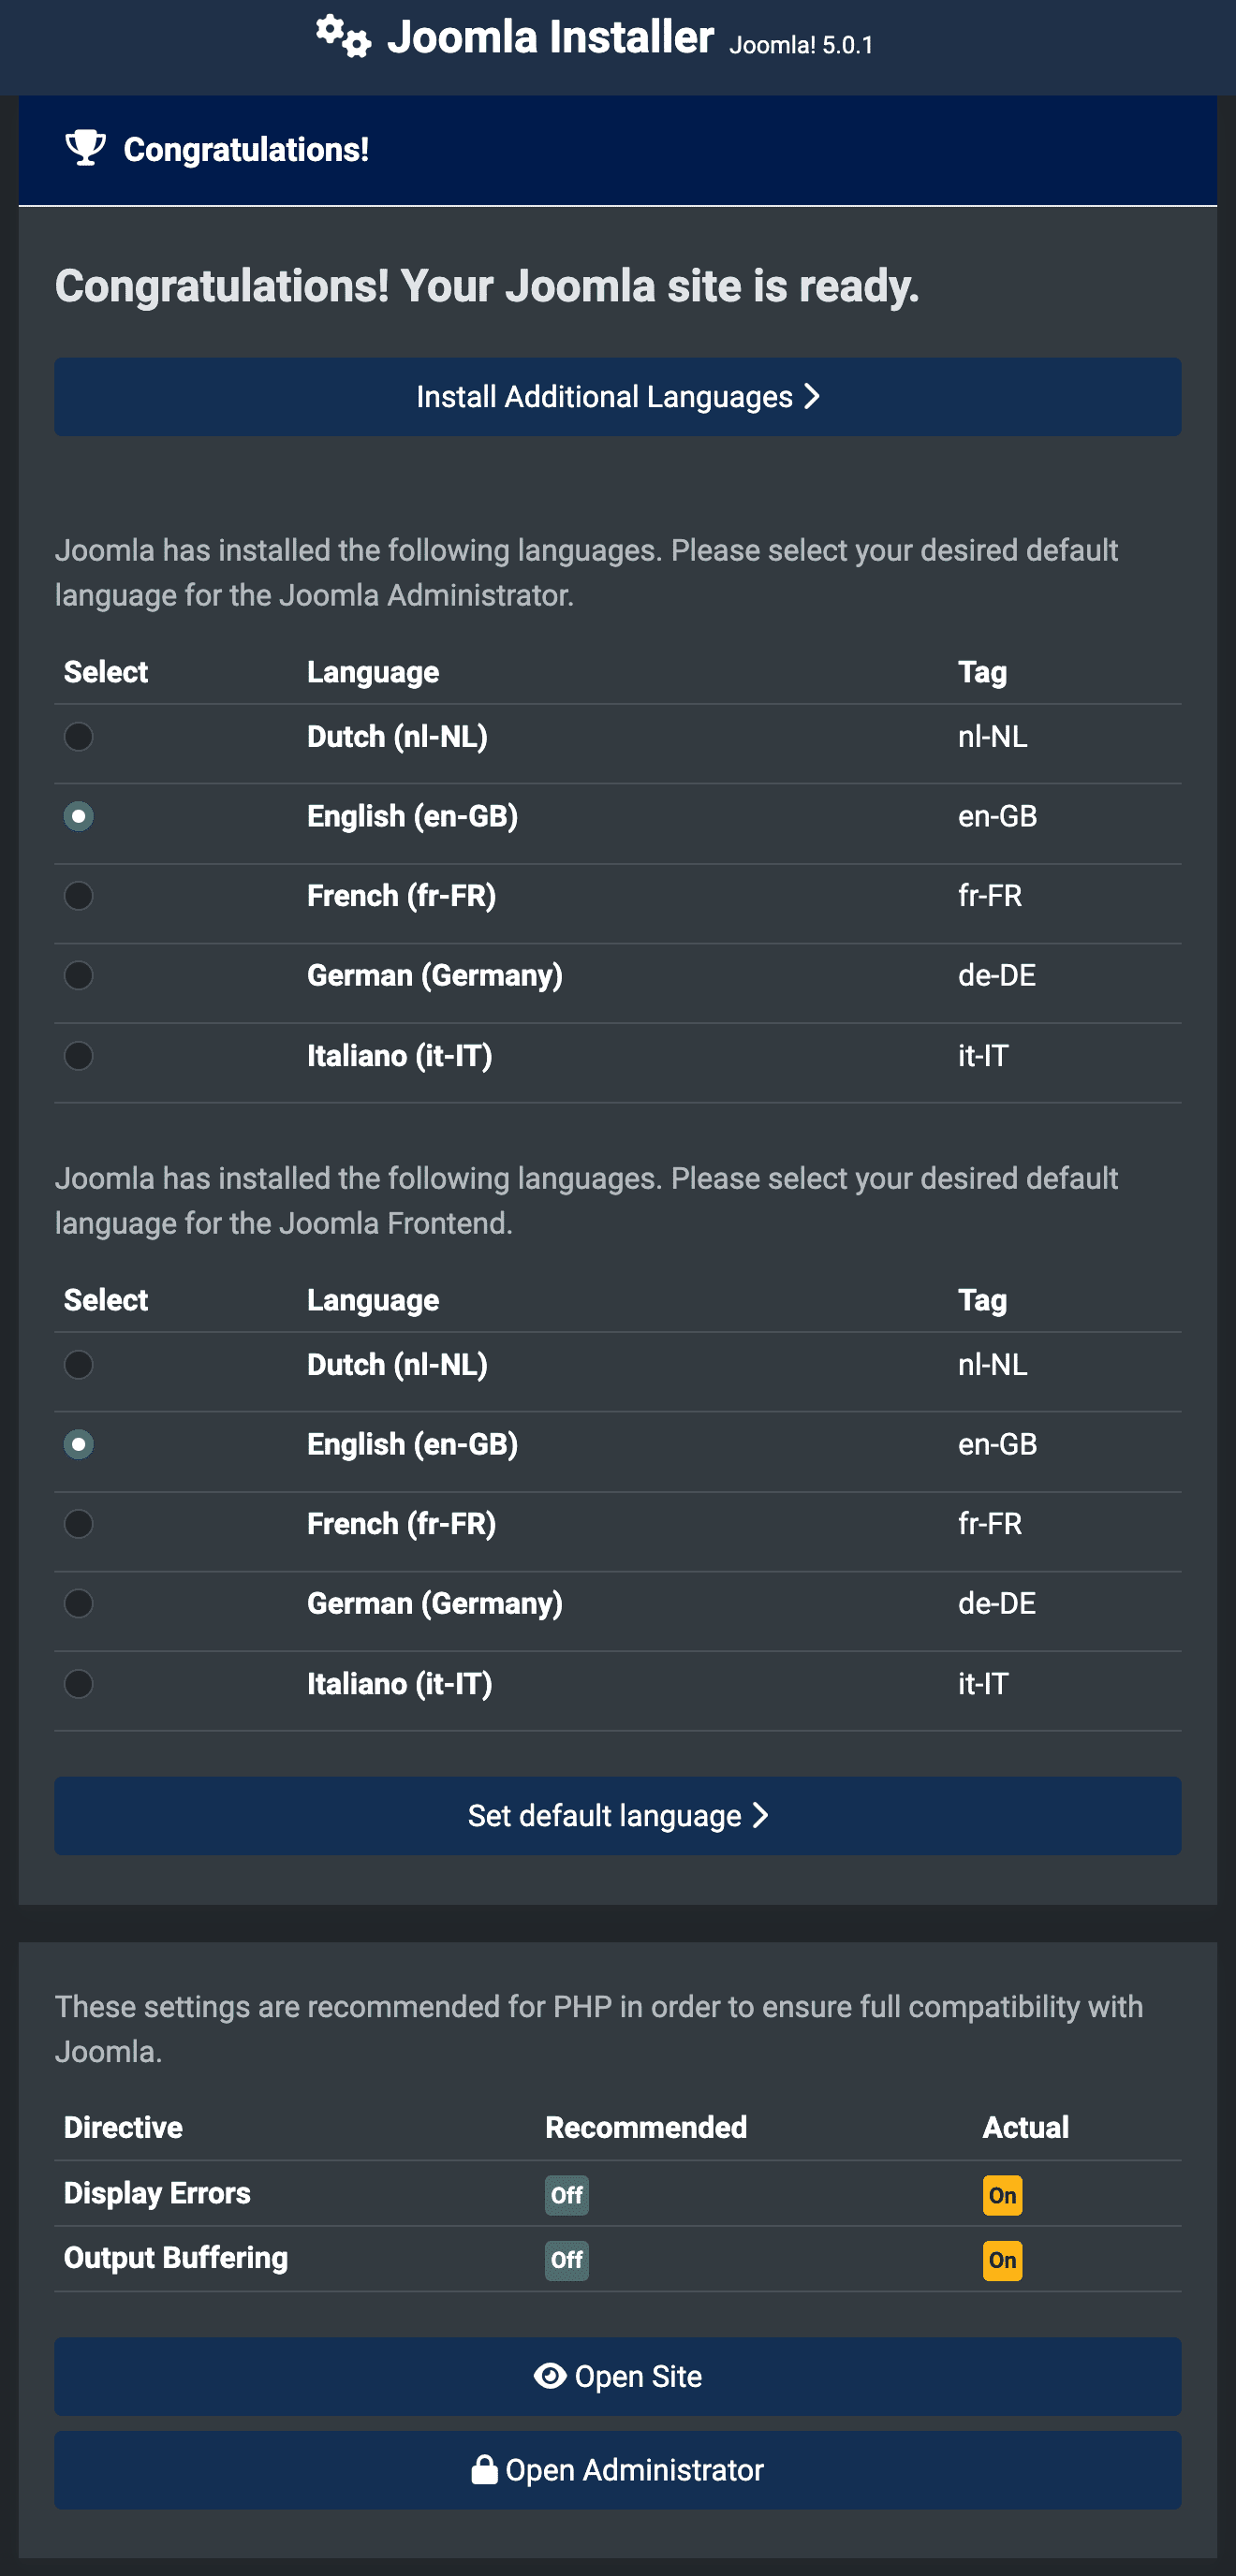
Finalise
You can now can navigate to the Administrator Dashboard. Log in by selecting Open Administrator or go right to your site Home page by selecting Open Site.
Uninstall HikaShop or VirtueMart
On some templates where both HikaShop and VirtueMart are installed for demonstration purposes, it is highly recommended to choose one and uninstall the other. This means if you decide to use HikaShop, uninstall VirtueMart, or if you have decided to use VirtueMart, then uninstall HikaShop completely by following:
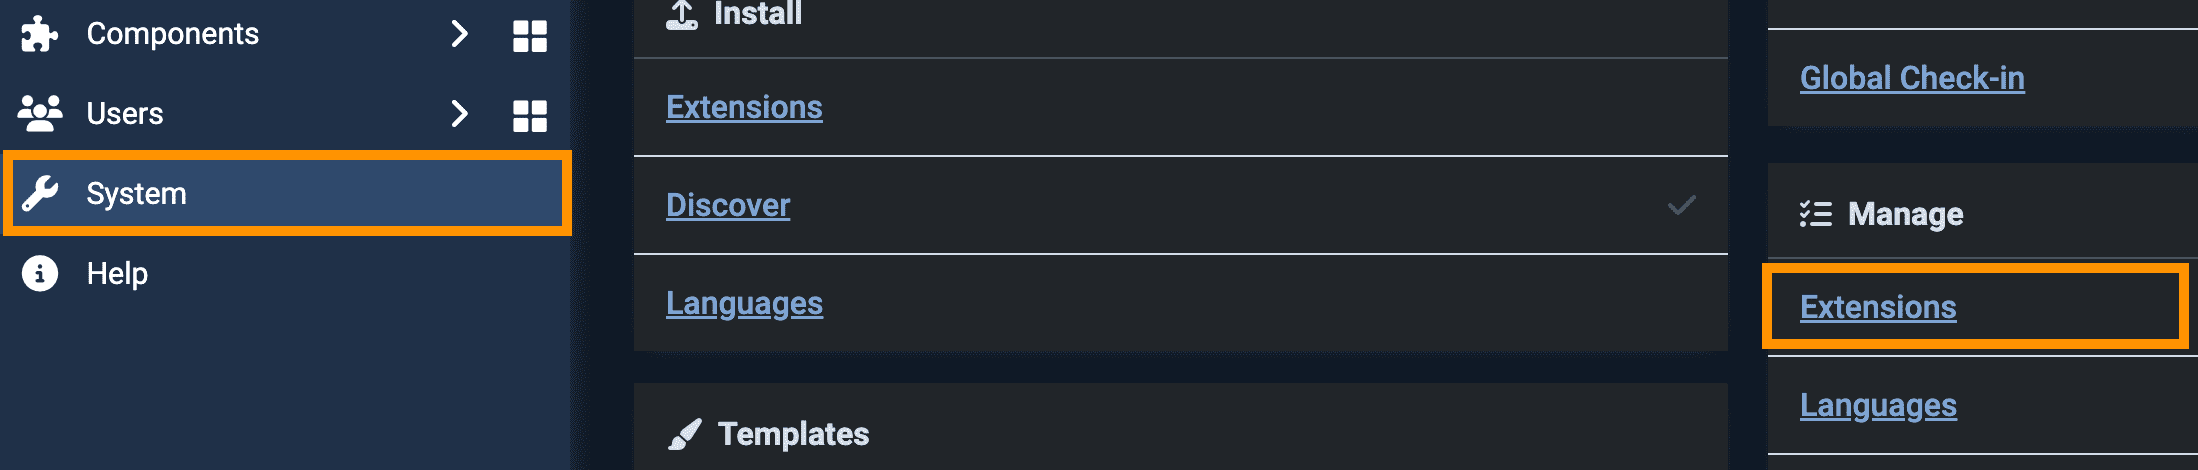
- Log in to Joomla! Administrator if you haven't already.
- Navigate to System in the left menu and then click on Extensions under the Manage section.
- If you're uninstalling VirtueMart, click on the Filter Options button > - Select Package - and then choose the VirtueMart Package.
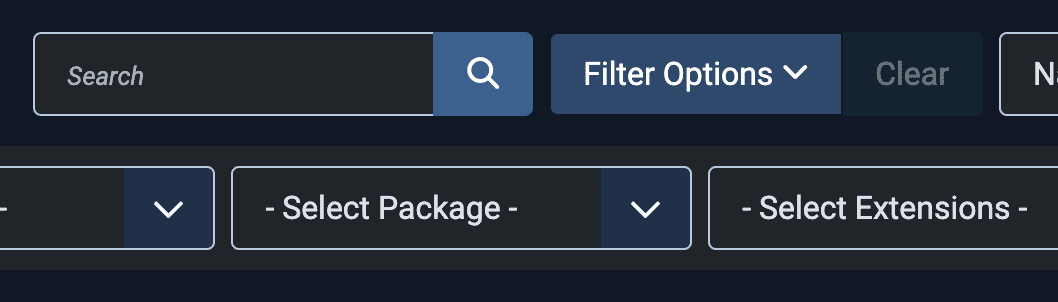
- If you're uninstalling HikaShop, type hikashop in the Search bar and then press enter on your keyboard.

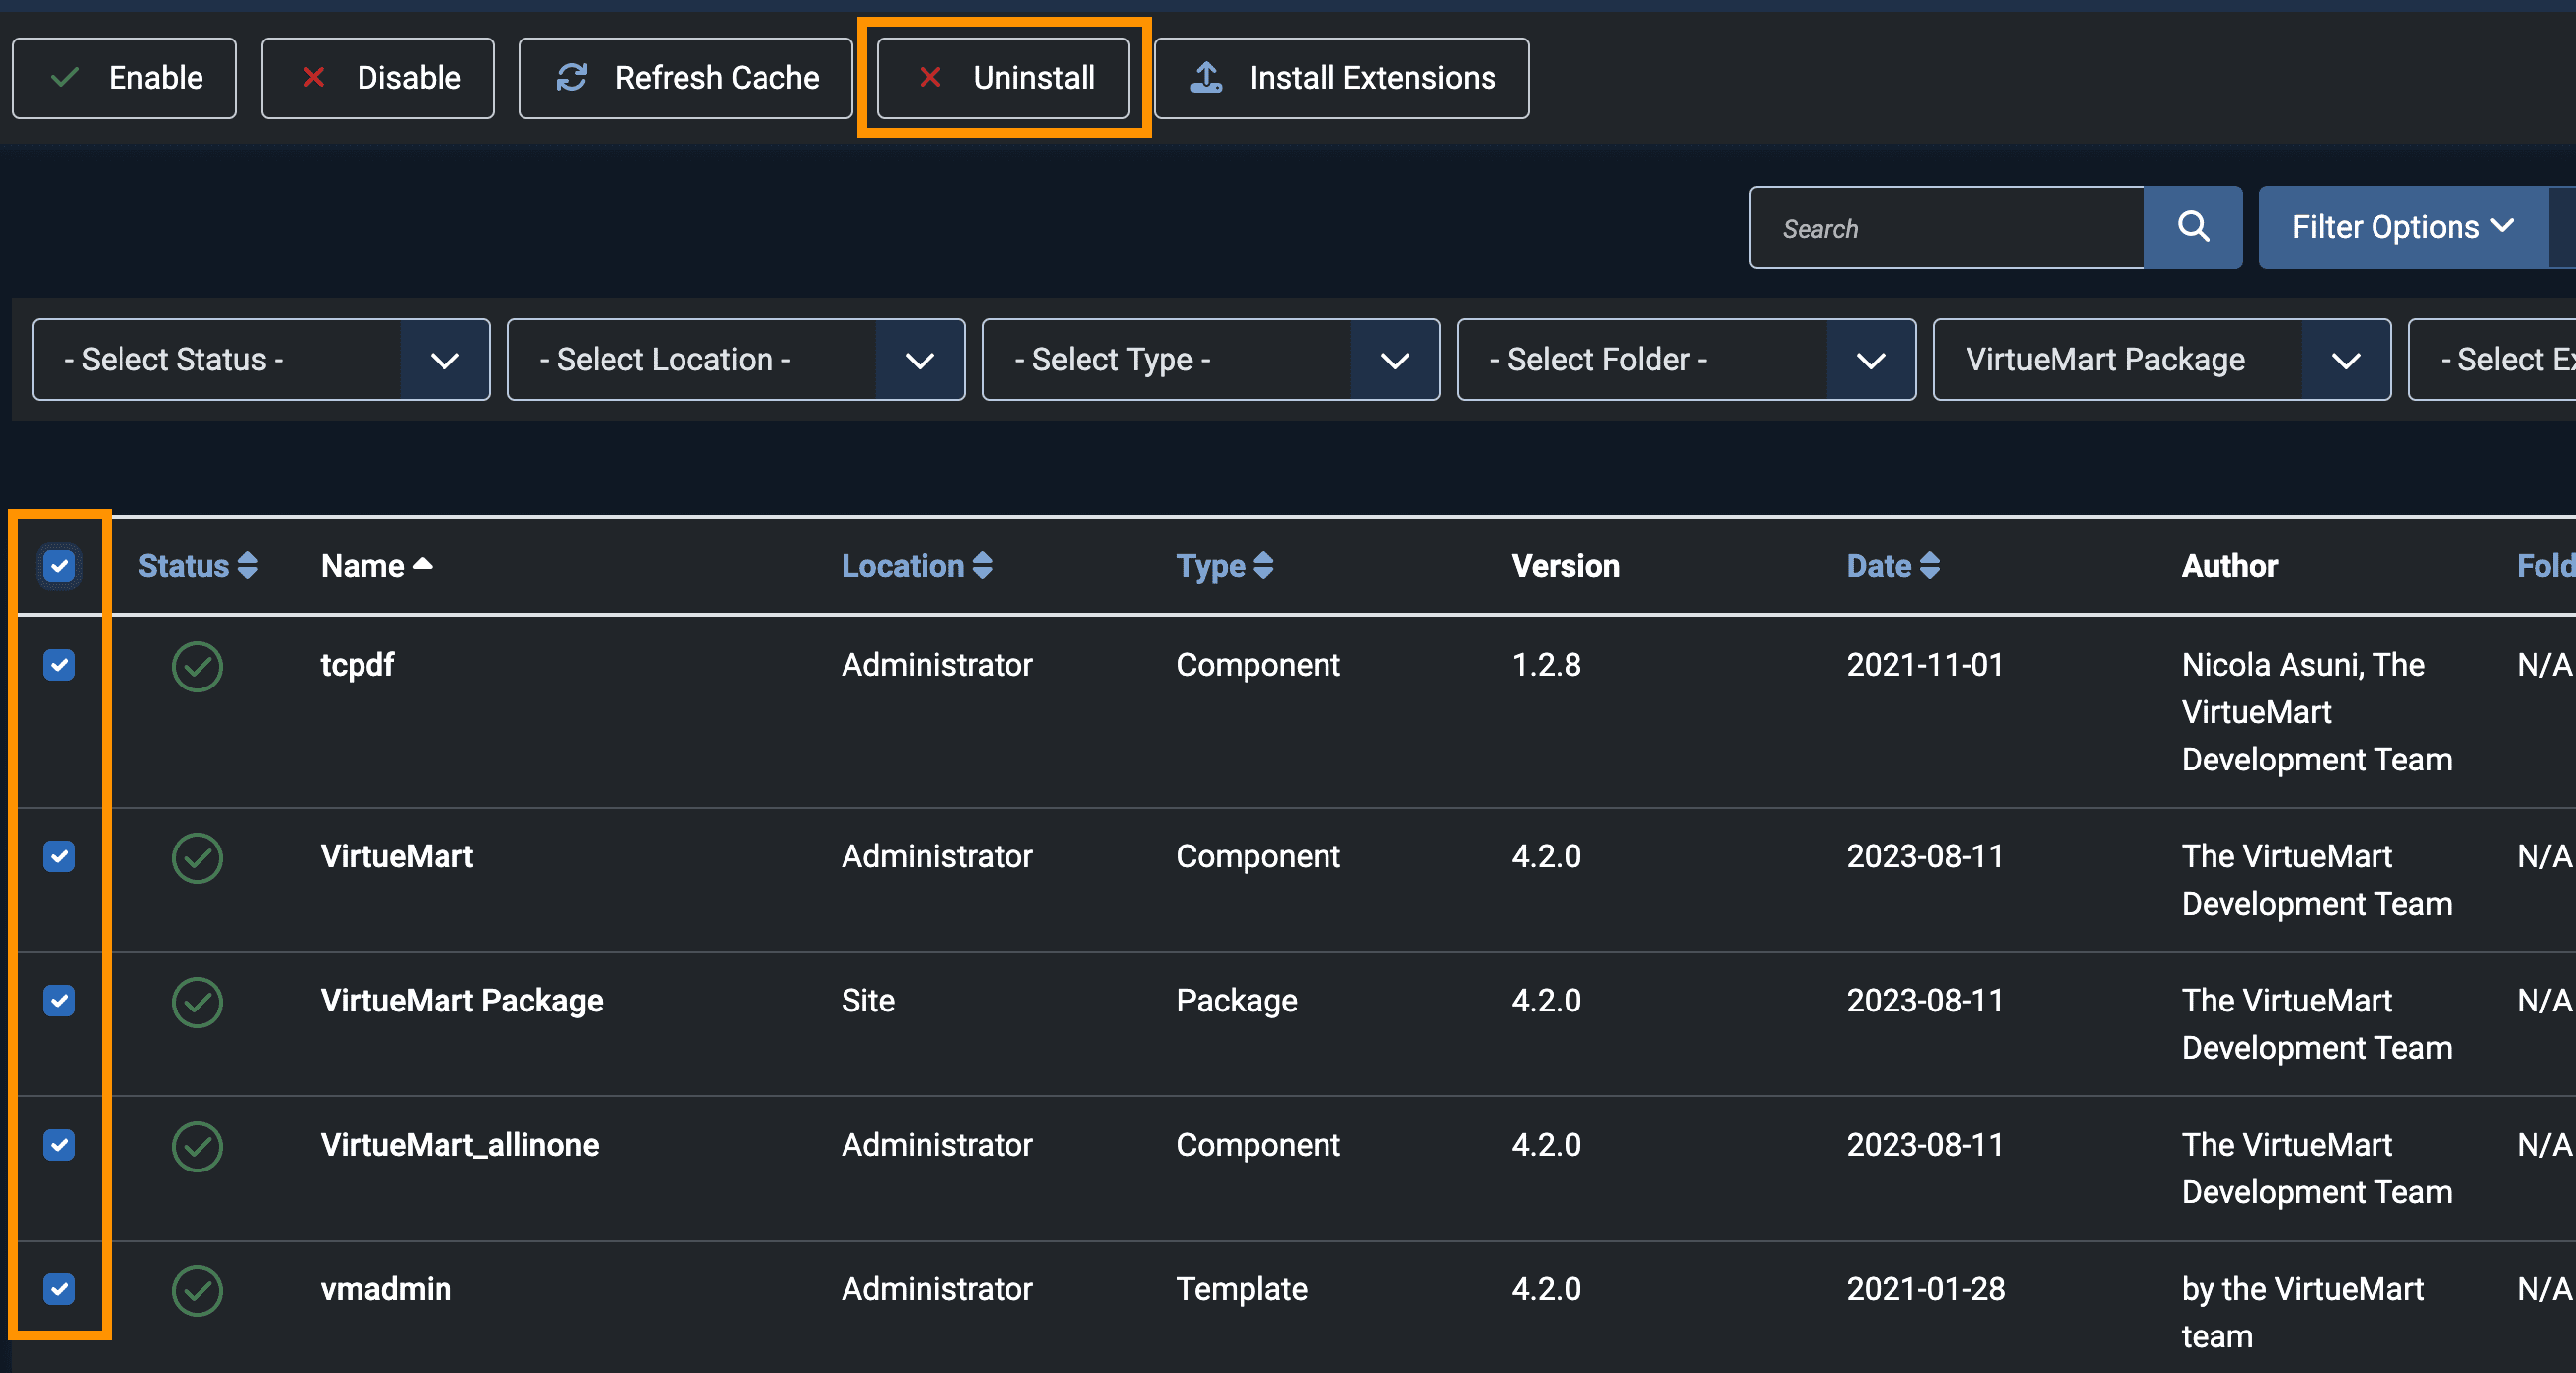
- Select all available extensions and then click on the Uninstall button.
Update the Template and Extensions
Uninstall HikaShop or VirtueMartIt's possible that we have updated extensions after creating the Quickstart package. After successfully installing the Quickstart package, it's highly recommended to-
- Download the template and all available extensions from your downloads.
- Install them one by one to ensure you're using the latest version.
- Update or re-install HikaShop or VirtueMart latest version.
- If any compatibility issues arise, we update the Quickstart package or the template. Therefore, it's safe to update to the latest version available.